Introductory exercise to ASReview LAB
Introduction to the software ASReview LAB
The goal of this exercise is to get familiar with AI-aided screening by making use of ASReview LAB v2.x.
You will learn how to install and set up the software, upload data, screen records, and export and interpret the results. The exercise will guide you through all the steps of AI-aided screening as described in the workflow on Read-the-Docs.
Enjoy!
Getting familiar
Before you start, you might want to read a bit more on:
The paper that was published in Nature Machine Intelligence
The Software
Step 1: Installing Python and ASReview LAB
First, you need to install Python. The minimum Python version required is Python 3.10.
Once you have Python installed, you can go through the easy 3-step guide to installing (or upgrading) ASReview on the ASReview-website.
More detailed installation information, troubleshooting, and instructions to install ASReview LAB on a server or via Docker are available on ReadTheDocs.
Did you install the latest version of ASReview? You can proceed to step 2!
Step 2: Starting ASReview LAB
To open ASReview LAB in your browser, you need to start it in the terminal. You can open your terminal by typing terminal (cmd on Windows 10 or lower) in your computer’s search bar (select Run as administrator if you have this option).
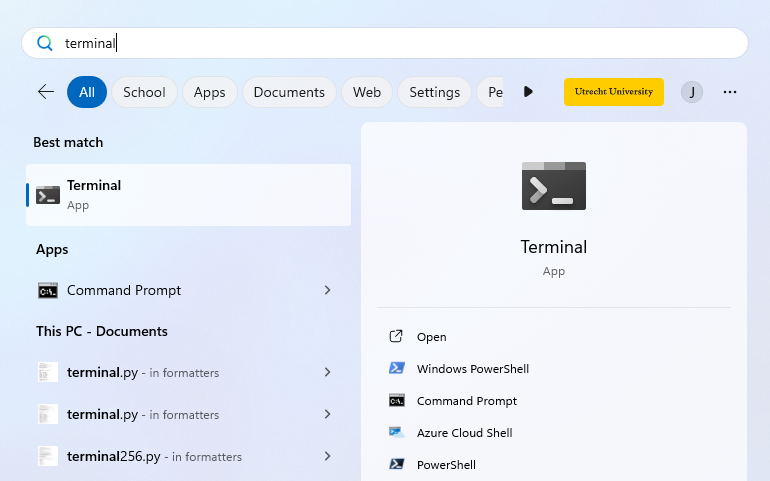
The terminal will open, in which you can type the following command and press enter:
asreview labNote that you have to keep your command-line interpreter running while using ASReview LAB, even though the interface is in your browser!

It takes a few seconds for ELAS - your Electronic Learning Assistant - to start the software. It will appear in your (default) web browser.
But why do you need to start it up by running code in your command prompt? This ensures that ASReview LAB runs locally. More specifically, your data is and stays your own. Small price to pay for complete privacy, right?! Read more about the key principles in the Zen of Elas!
You can also run the software via a server, but you need to take care of hosting the server yourself (or ask your IT-department).
Did ASReview LAB open in your browser? If so, you can proceed to step 3!
Project Setup
Step 3: Selecting a Dataset
Without data, we have nothing to screen. So, you need to tell ELAS which dataset you want to screen for relevant articles.
For this exercise we will carry out a so-called Validation Review using ASReview. To be able to do a Validation Review, we are going to make use of a benchmark dataset. This means that all records in the dataset have already been labeled as relevant or irrelevant.
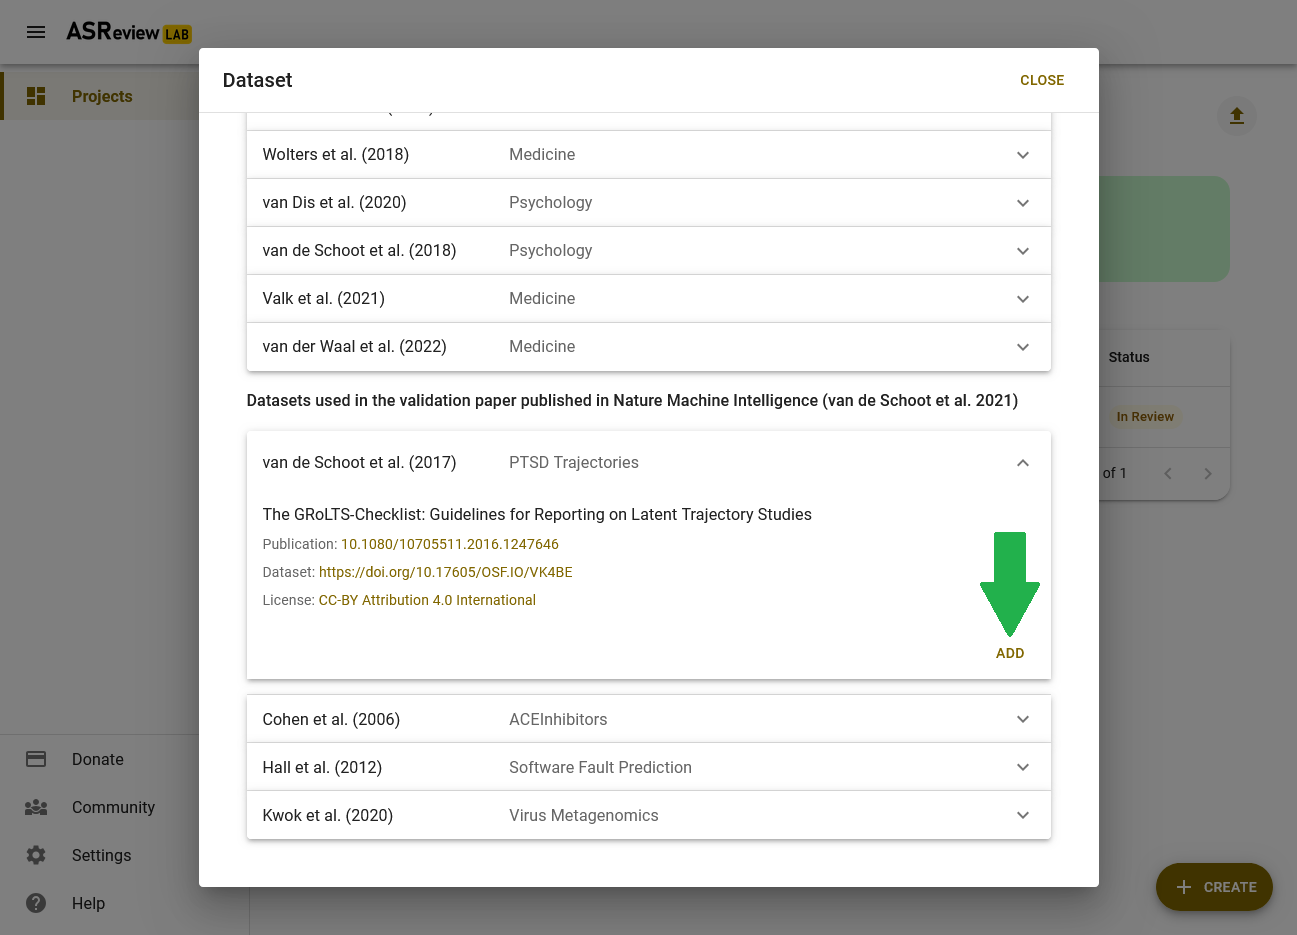
Click on the Discover button, highlighted with a green circle.
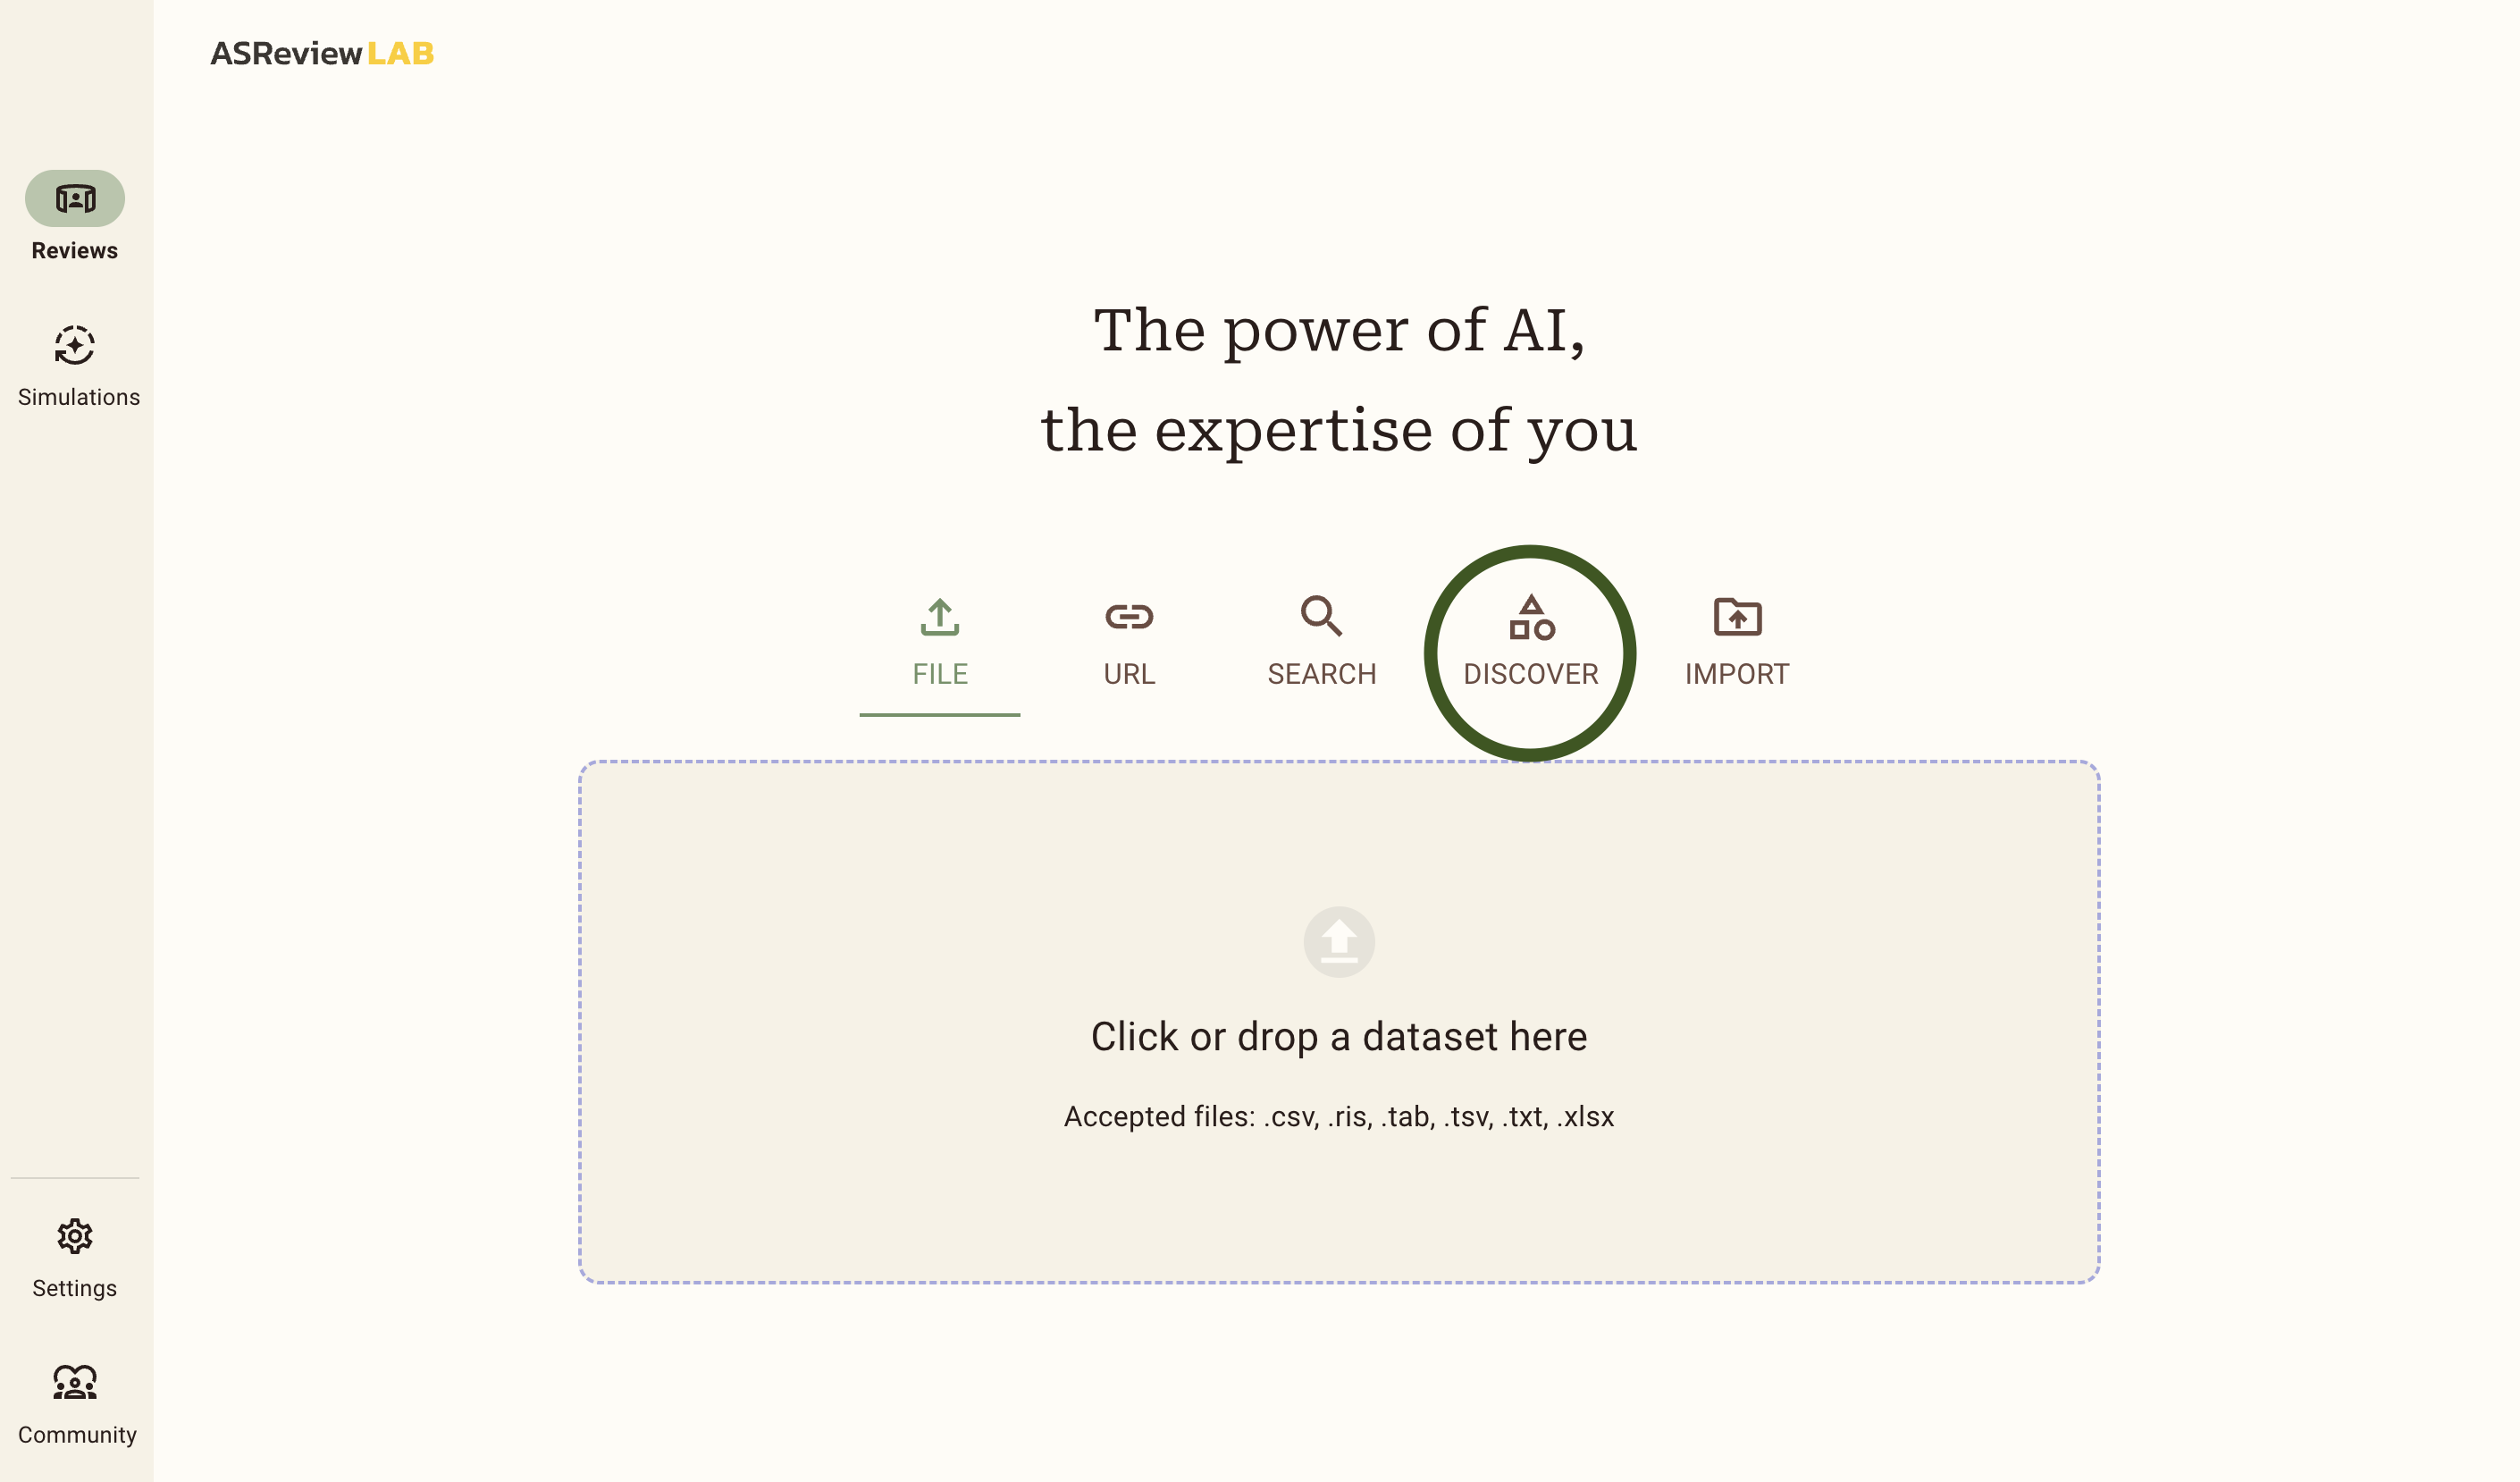
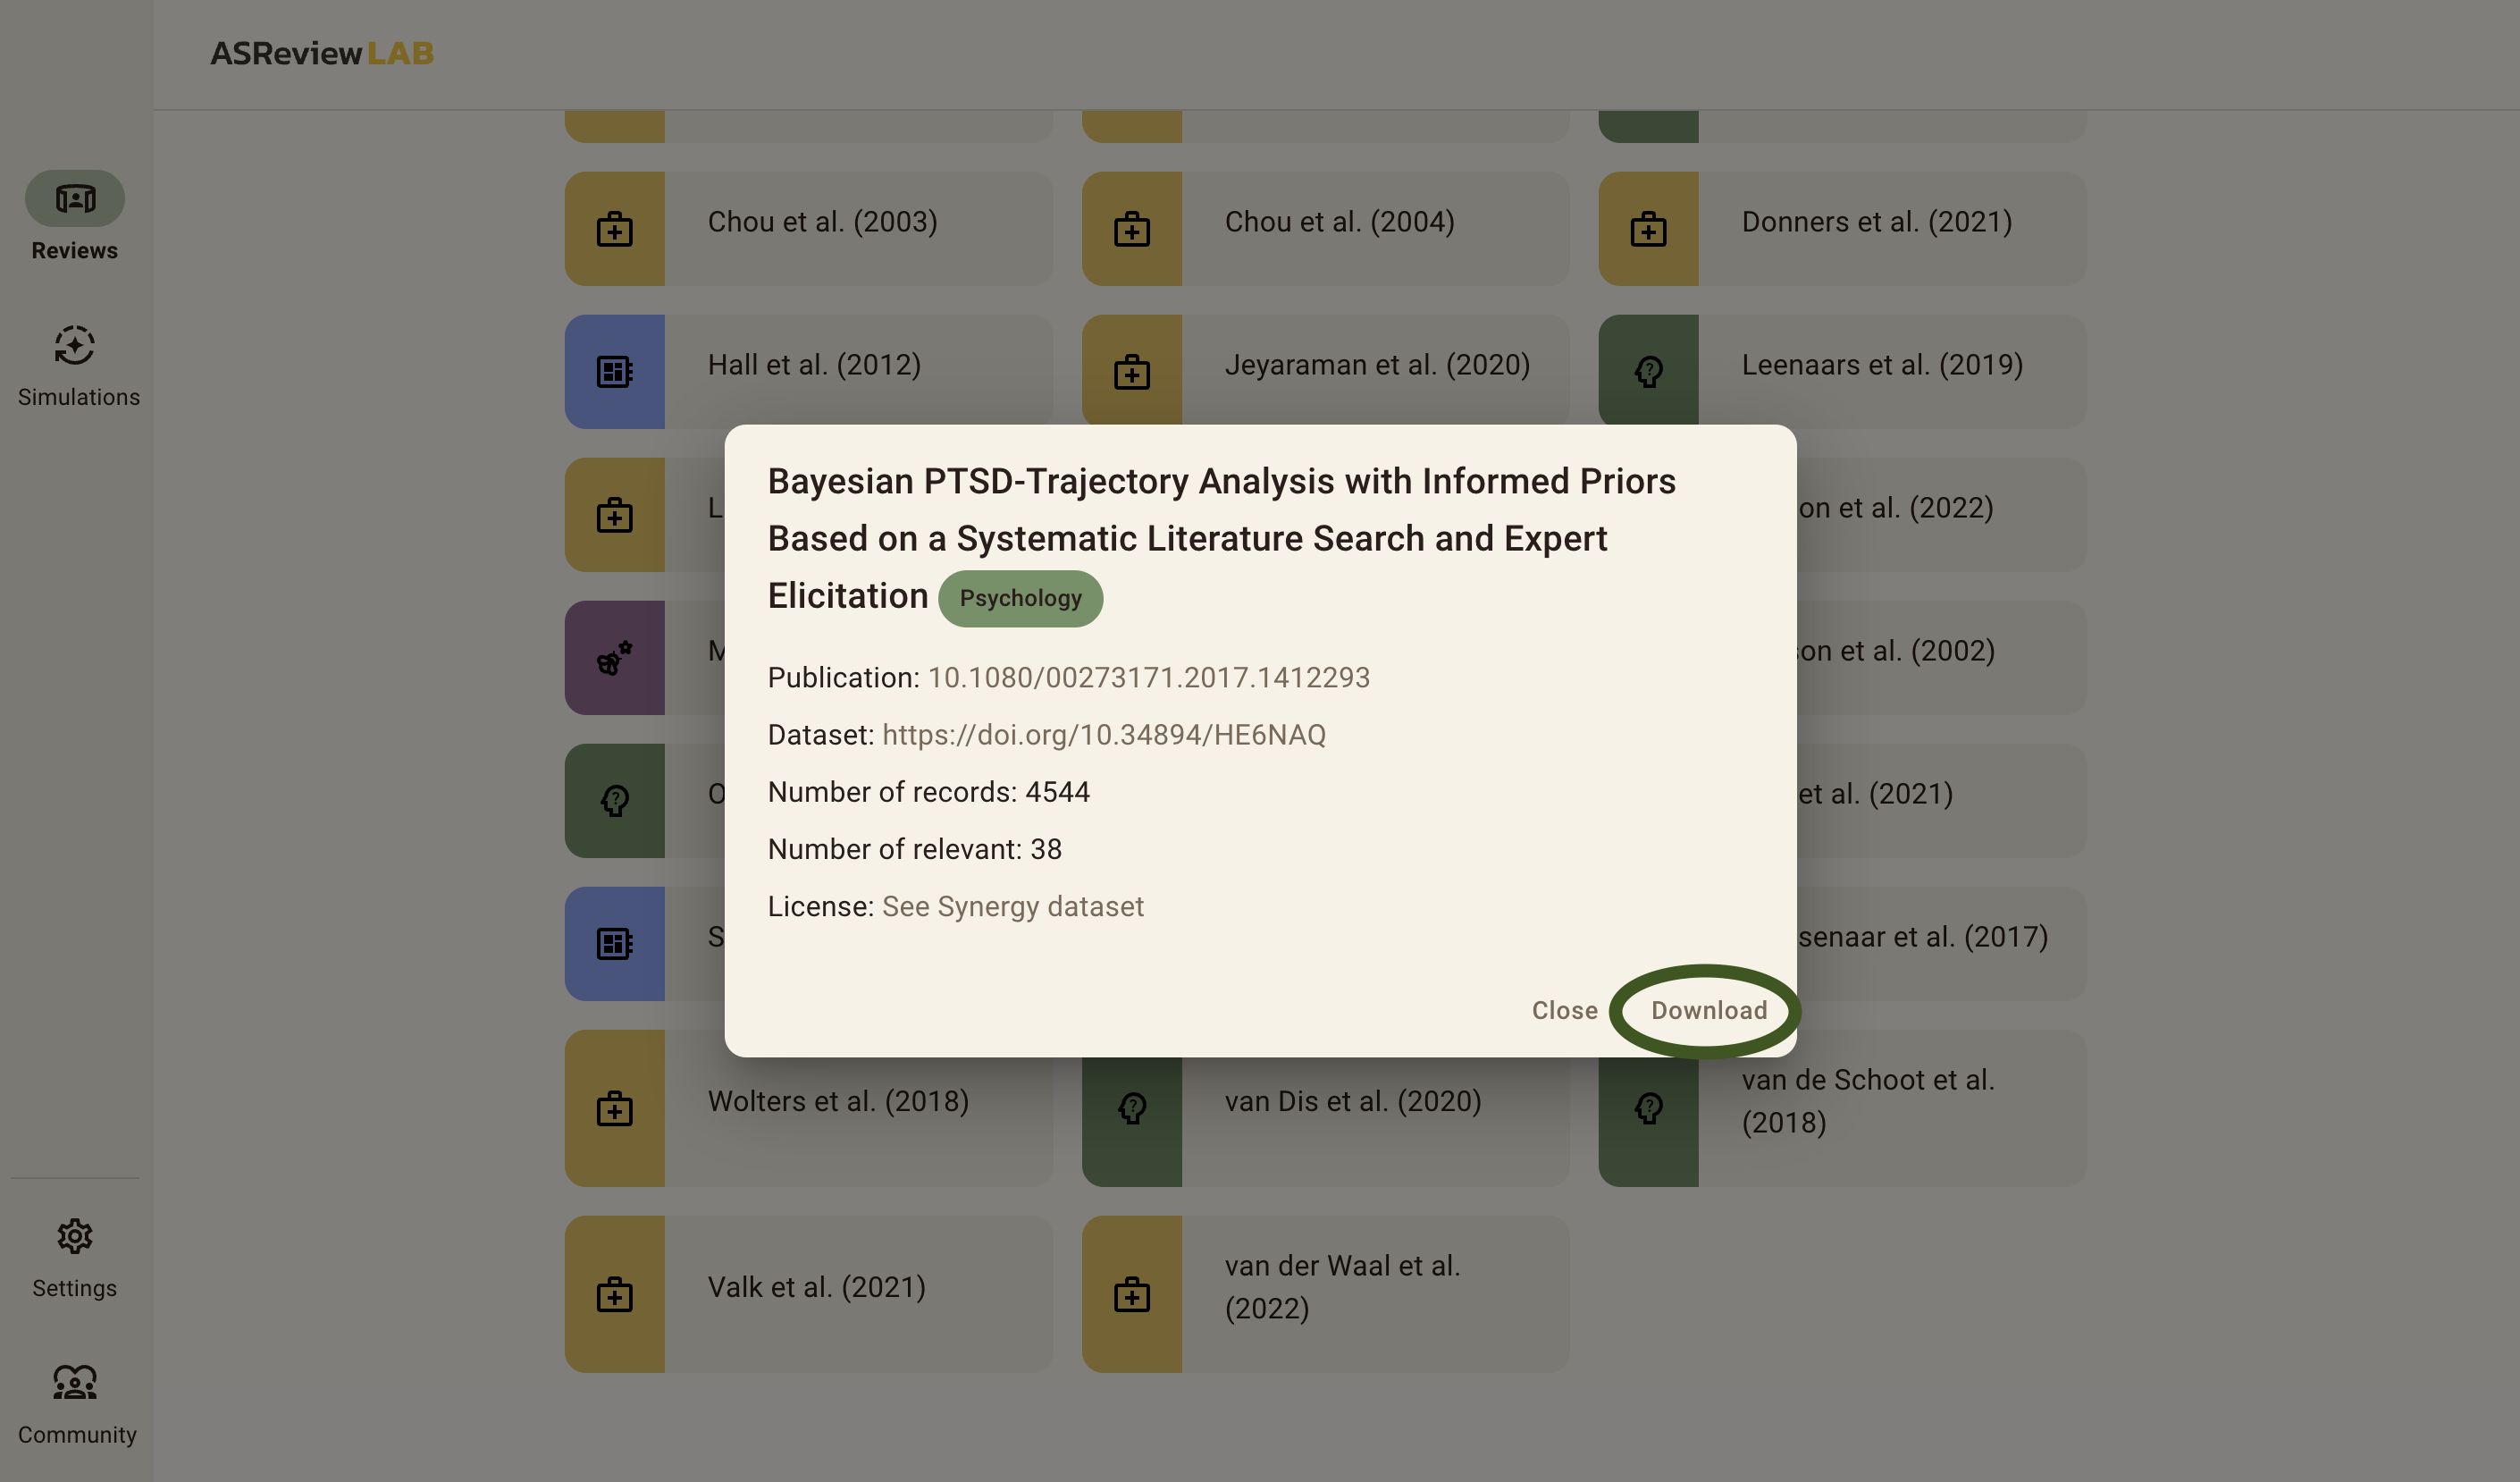
This will show you a list of 26 benchmark datasets that are already labeled. In this example we will use the van de Schoot et al. (2018) dataset about PTSD trajectories. Scroll down to find the dataset, and click on it.
Then, you will be shown a menu with a download button. Click Download, and wait until the download finishes. When the download finishes, a new menu pops up which brings us to the next step: Setting up the project.
Did you successfully download a dataset? If so, you can proceed to step 4!
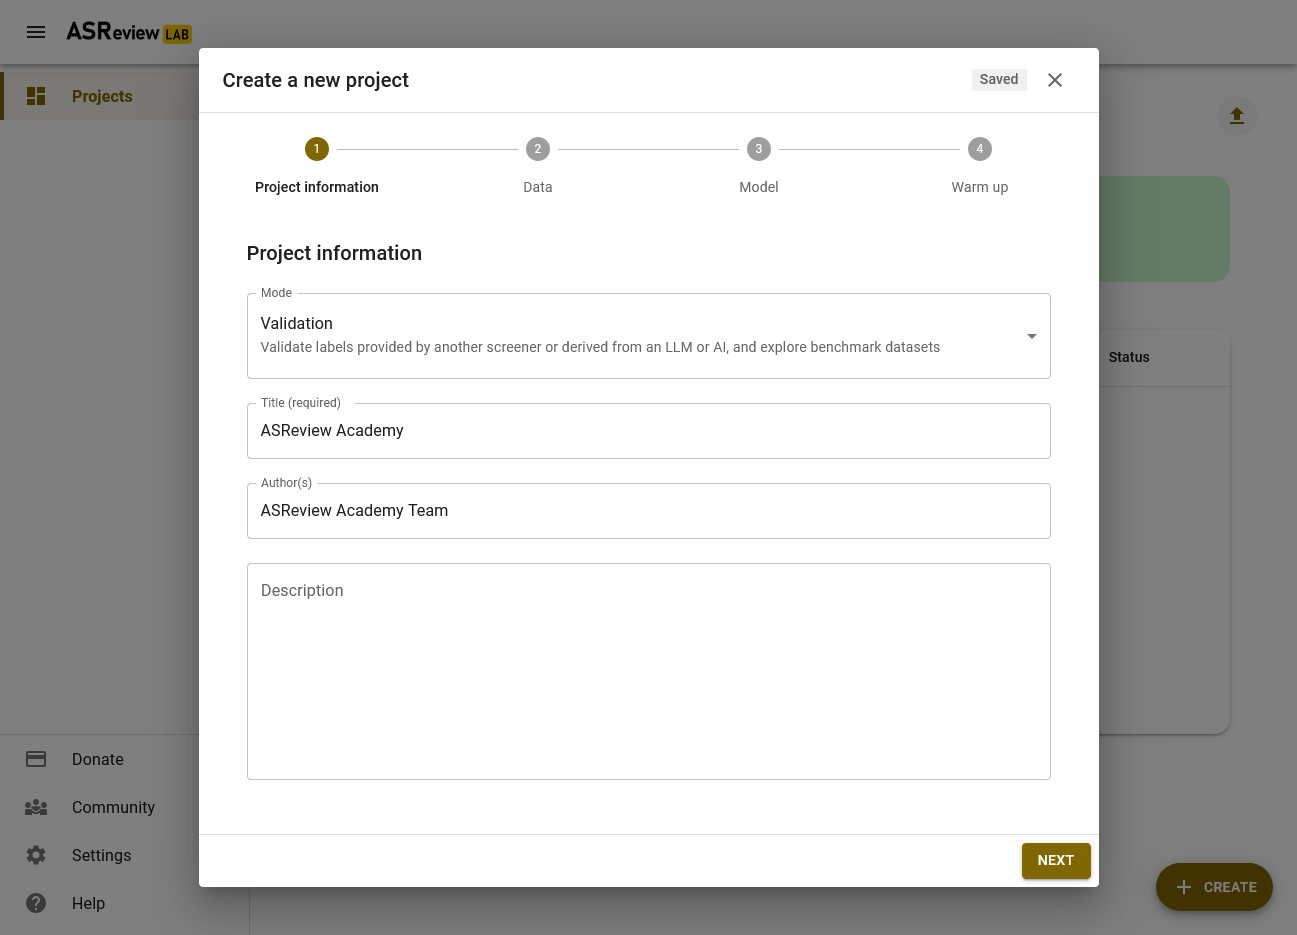
Step 4: Setting up a Project
Now that the dataset is downloaded, we can continue with setting up the project. First, click on the pencil icon at the top of this menu to change the name of your project. You can also keep the default name.
The next step is important for this exercise, but when using ASReview for your own review there are cases where you can skip this, see here for more information.
Click on the Show Options button and proceed to the next step.
More detailed information about setting up a project can be found on ReadTheDocs.
Did you successfully create a project, and did you click Show Options? If so, you can proceed to step 5!
Step 5: Prior knowledge
Before you can start screening the records, you need to tell ELAS what kind of records you are and what kind of records you are not looking for (i.e., relevant and irrelevant records, respectively). We call this prior knowledge. Based on the prior knowledge you provide, ELAS will reorder the stack of papers and provide you with the record that is most likely to be relevant (default settings).
When performing a systematic review with your own data, you need to provide the prior knowledge yourself (at least one relevant and one irrelevant record). However, because you are doing a Validation Review using ASReview, the relevant records are known; the original authors have already read ALL records. See also the documentation about the selection of prior knowledge.
To select the prior knowledge you first need to scroll down to Prior knowledge, and click on the Search button.
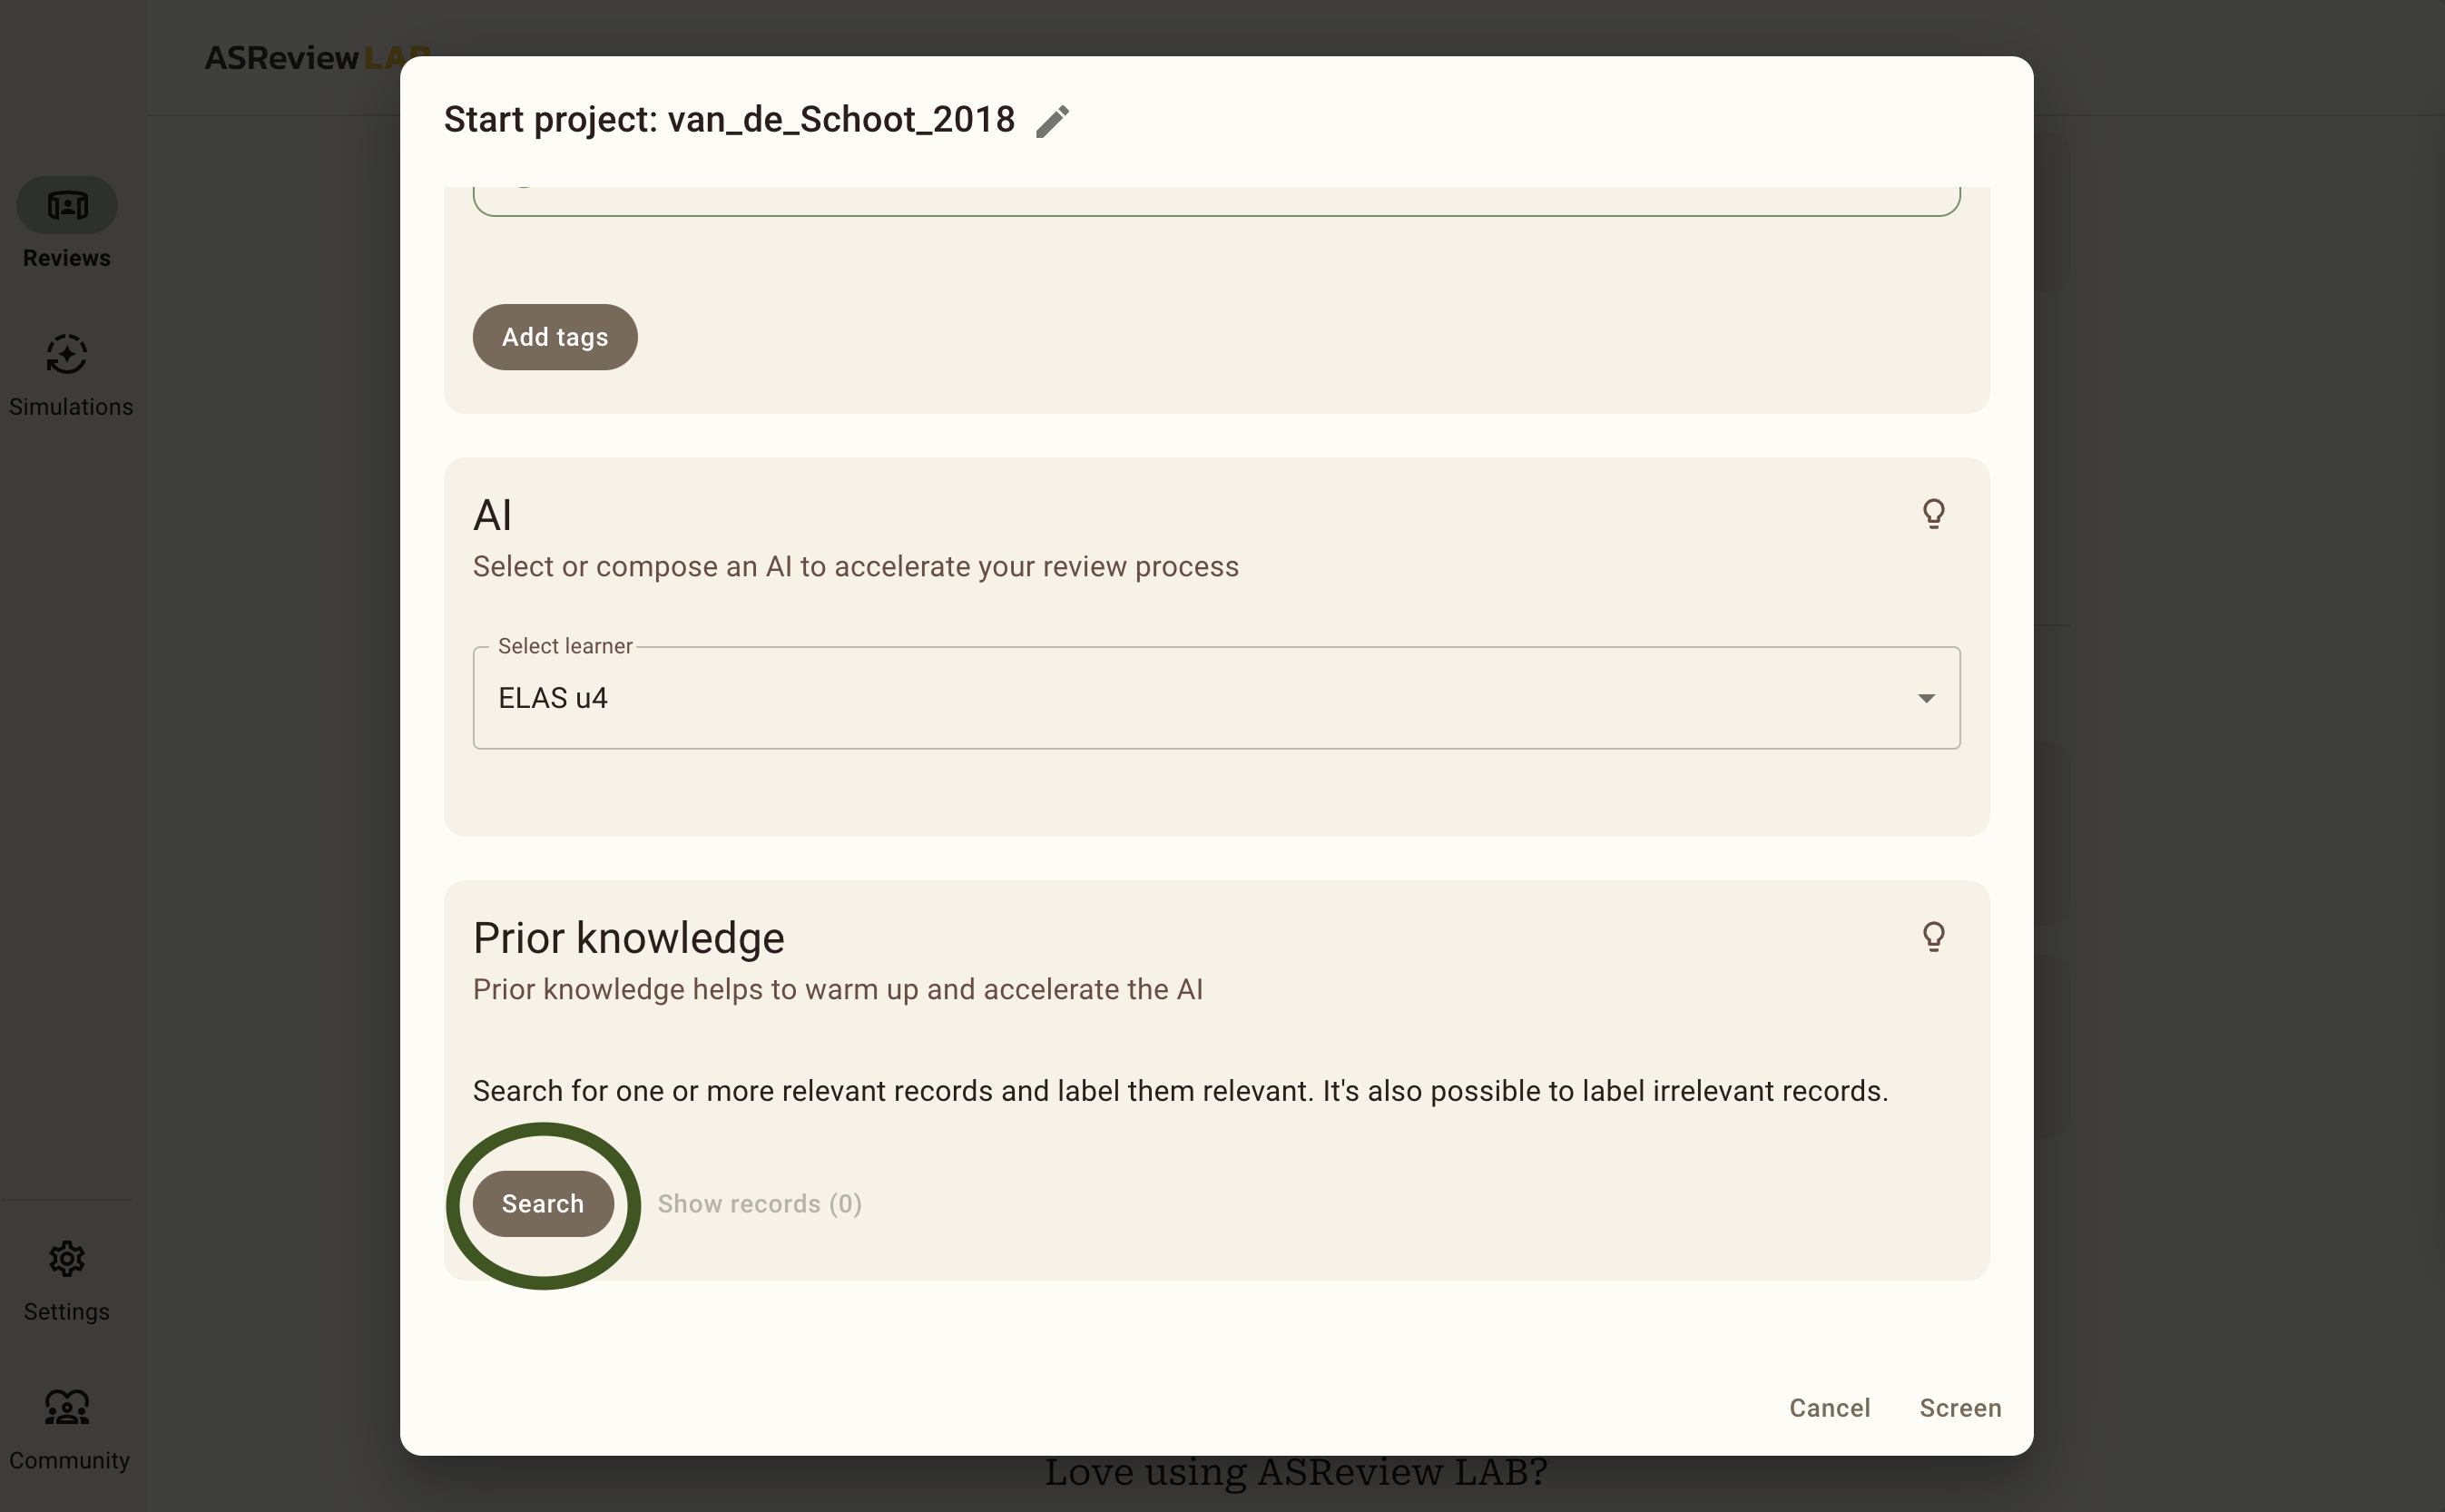
Now you will see a pop up that you can use to select prior knowledge.
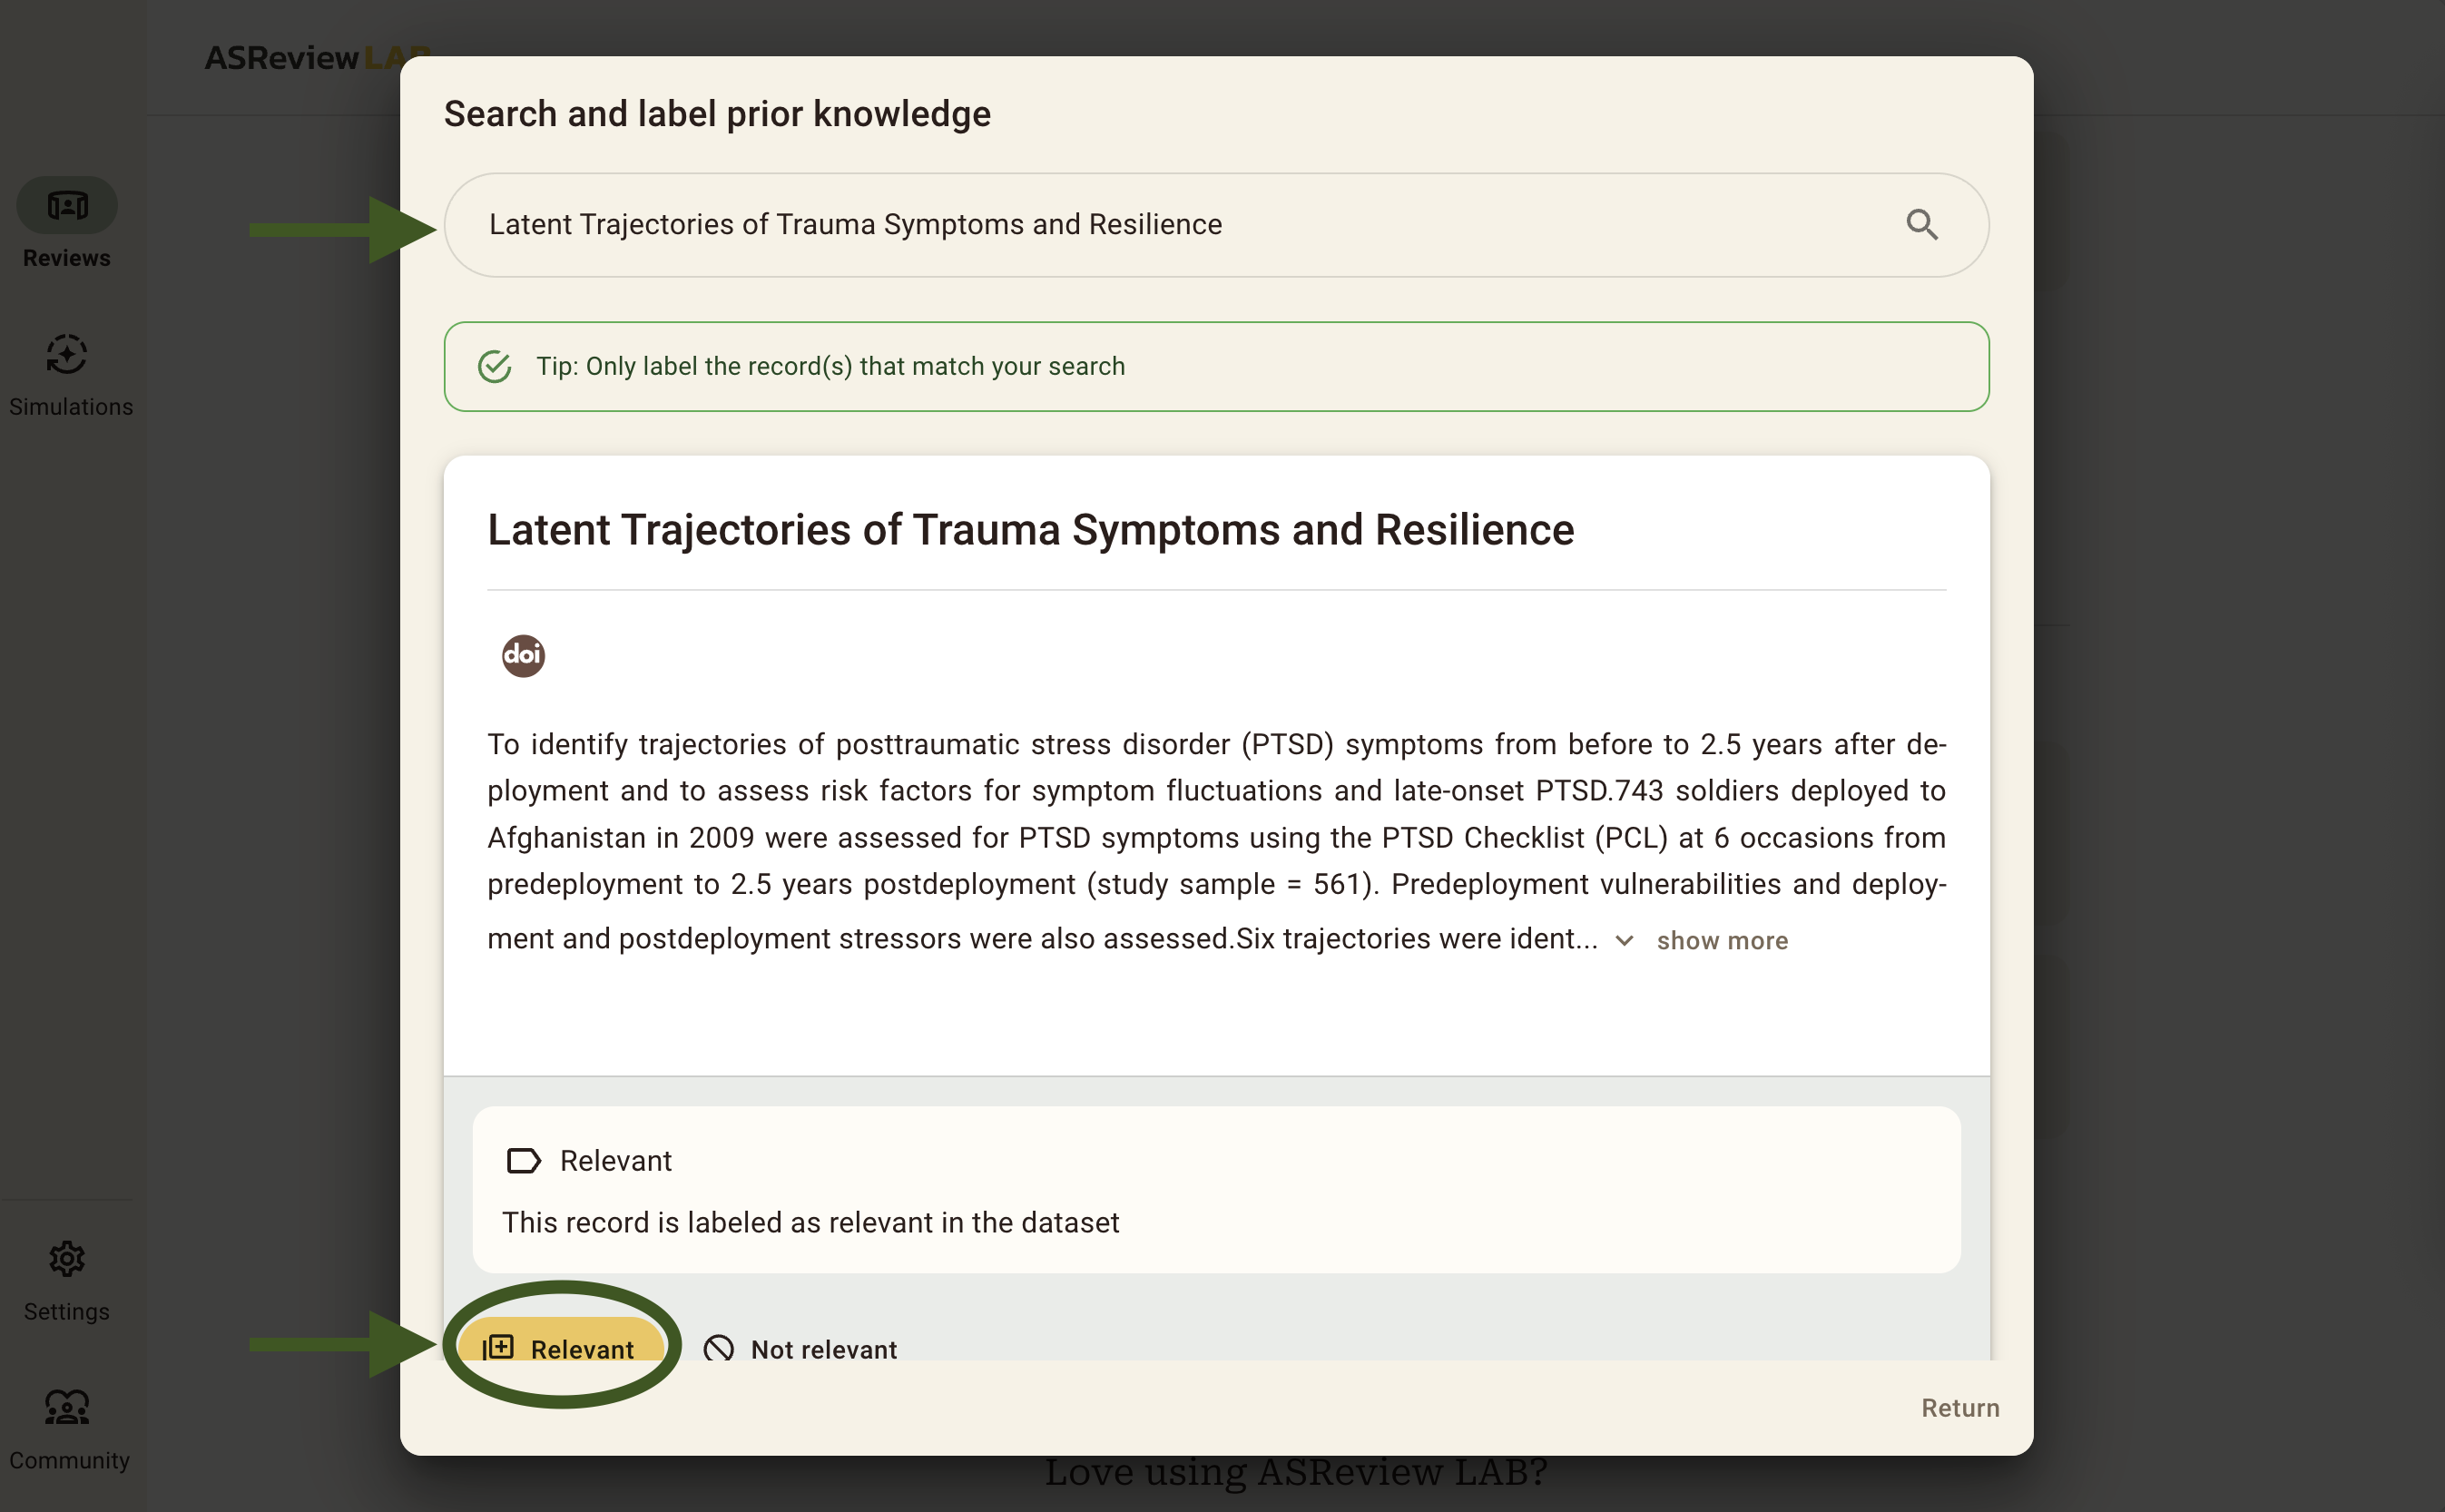
The following five papers are known to be relevant:
- Latent Trajectories of Trauma Symptoms and Resilience (DOI: 10.4088/JCP.13m08914)
- A Latent Growth Mixture Modeling Approach to PTSD Symptoms in Rape Victims (DOI: 10.1177/1534765610395627)
- Peace and War Symptoms Before, During, and After Military Deployment in Afghanistan (DOI: 10.1177/0956797612457389)
- The relationship between course of PTSD symptoms in deployed U.S. Marines and degree of combat exposure (DOI: 10.1002/jts.21988)
- Trajectories of trauma symptoms and resilience in deployed US military service members: Prospective cohort study (DOI: 10.1192/bjp.bp.111.096552)
To add the relevant records, you copy and paste the titles of these relevant records one by one in the search bar and add them as relevant. You should add between 1 and 5 relevant priors from this list. We only add relevant records as priors, because ASReview automatically provides us with random records during the screening phase until there is at least 1 relevant and 1 irrelevant label given by you. After that, ELAS will start to train on your data and it will sort the stack of unseen data whilst you are screening! When you are done adding 1 to 5 relevant priors, be sure to click the return button in the bottom right and continue to the next step.
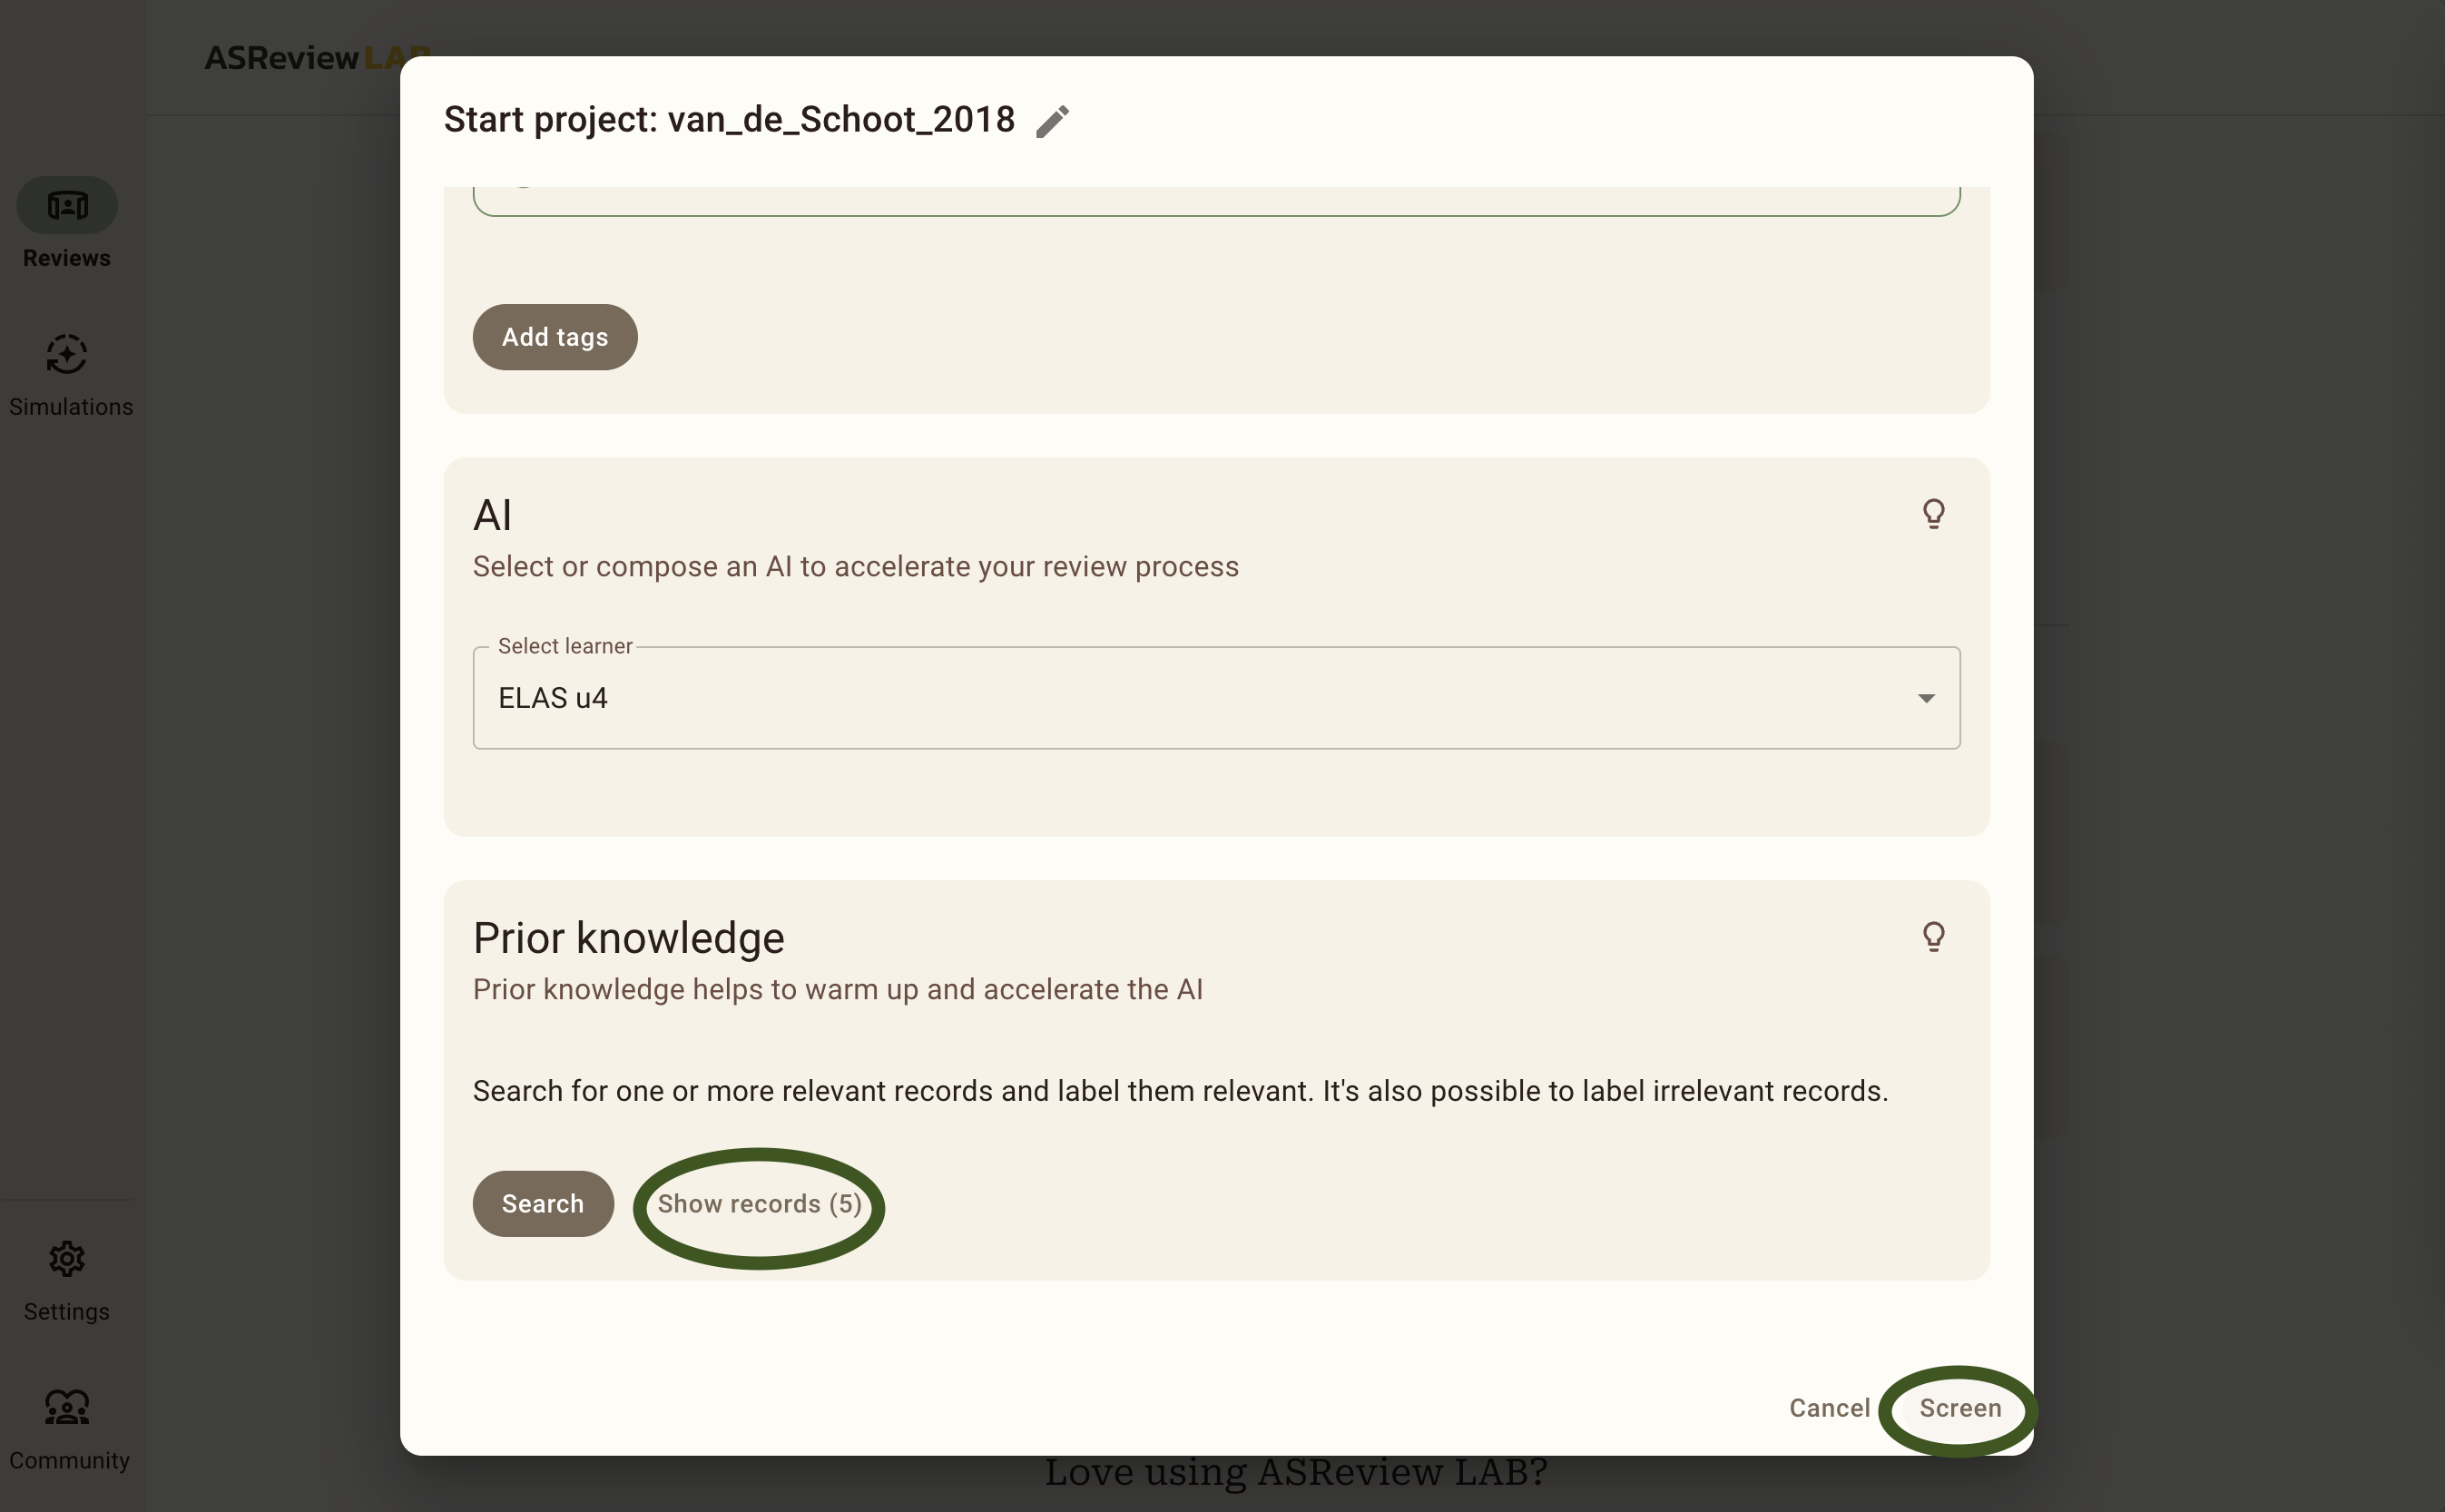
Then, you can see that the priors have been added correctly under Show records (5). If this number does not match the number of priors you have added, you can click on this button to see which ones you did add. After that, click Screen and continue to Step 6, the Screening Phase.
Did you select between 1 and 5 relevant records and click Screen? If so, you can proceed to step 6!
Screening phase
Step 6: Screening the Records
Everything is set up and ready to screen, well done!
Since we are doing a Validation Review using ASReview, you can pretend to be an expert on the topic of PTSD and pretend you have all the knowledge of the original screeners. All records in the dataset have been labeled as relevant/irrelevant, which is indicated through a banner below each article. Click on the Relevant button (or press R on your keyboard) if the record is marked as relevant. If not, you can press the Irrelevant button (or I on your keyboard).
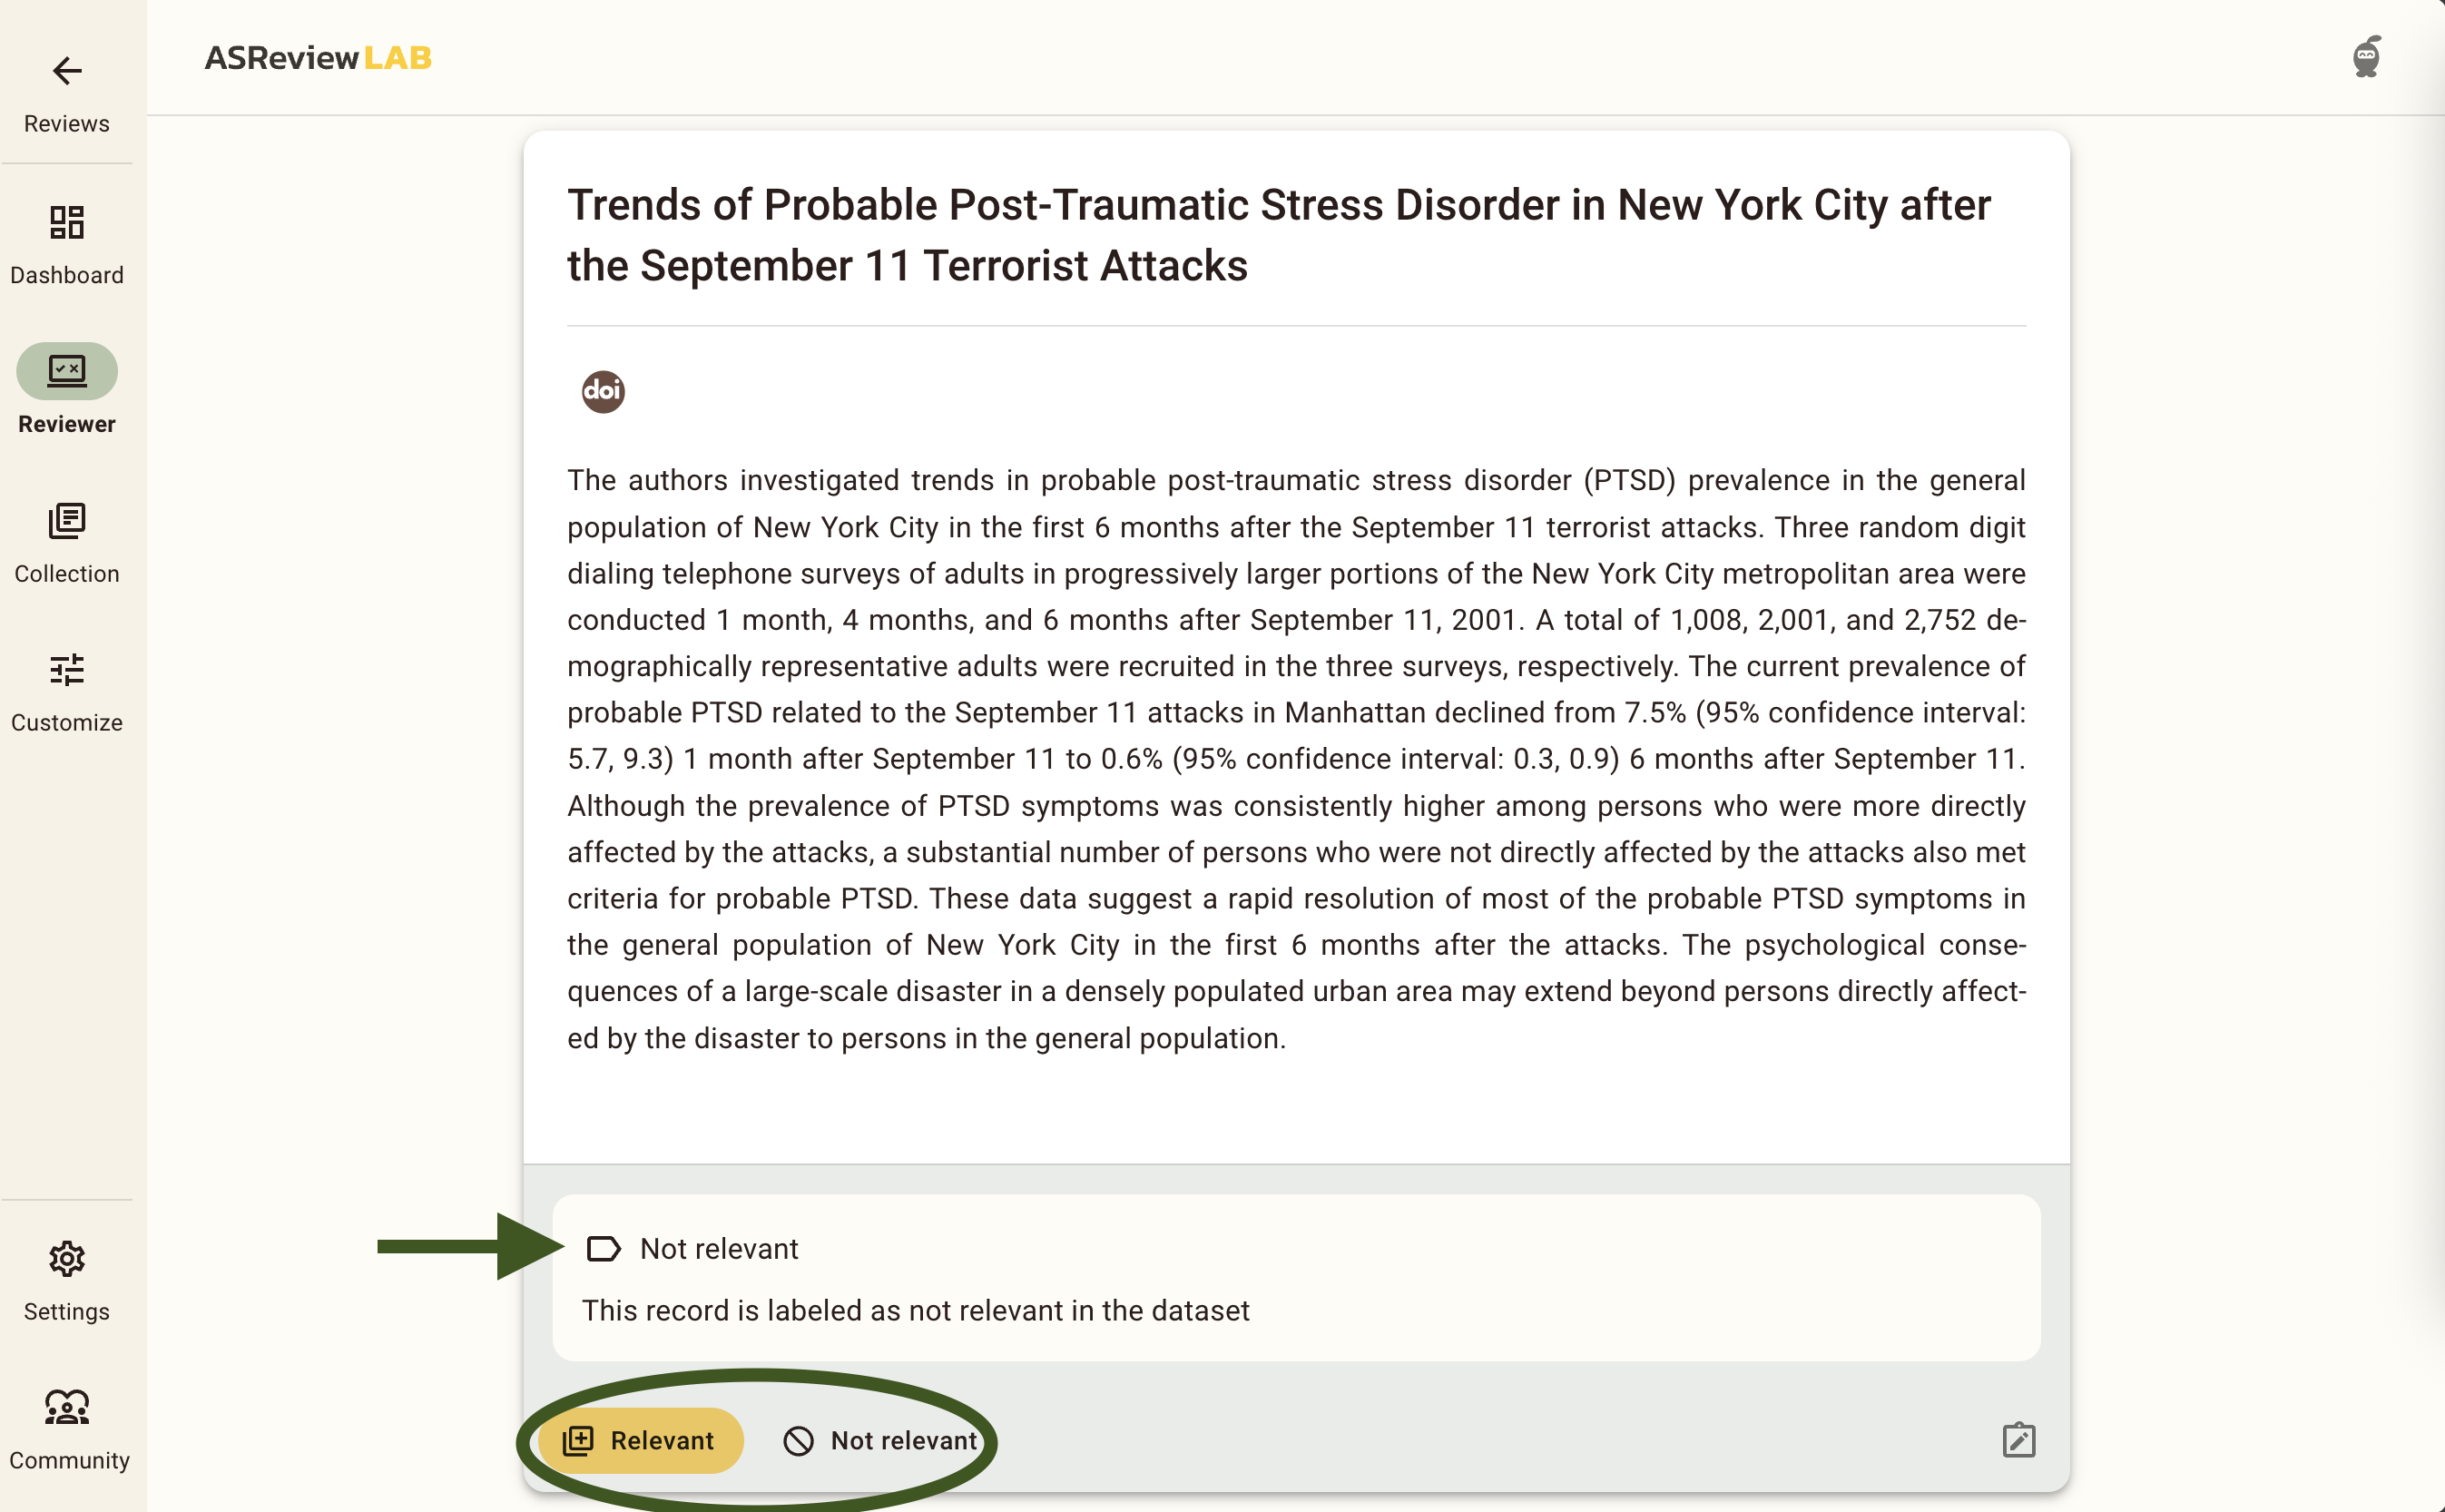
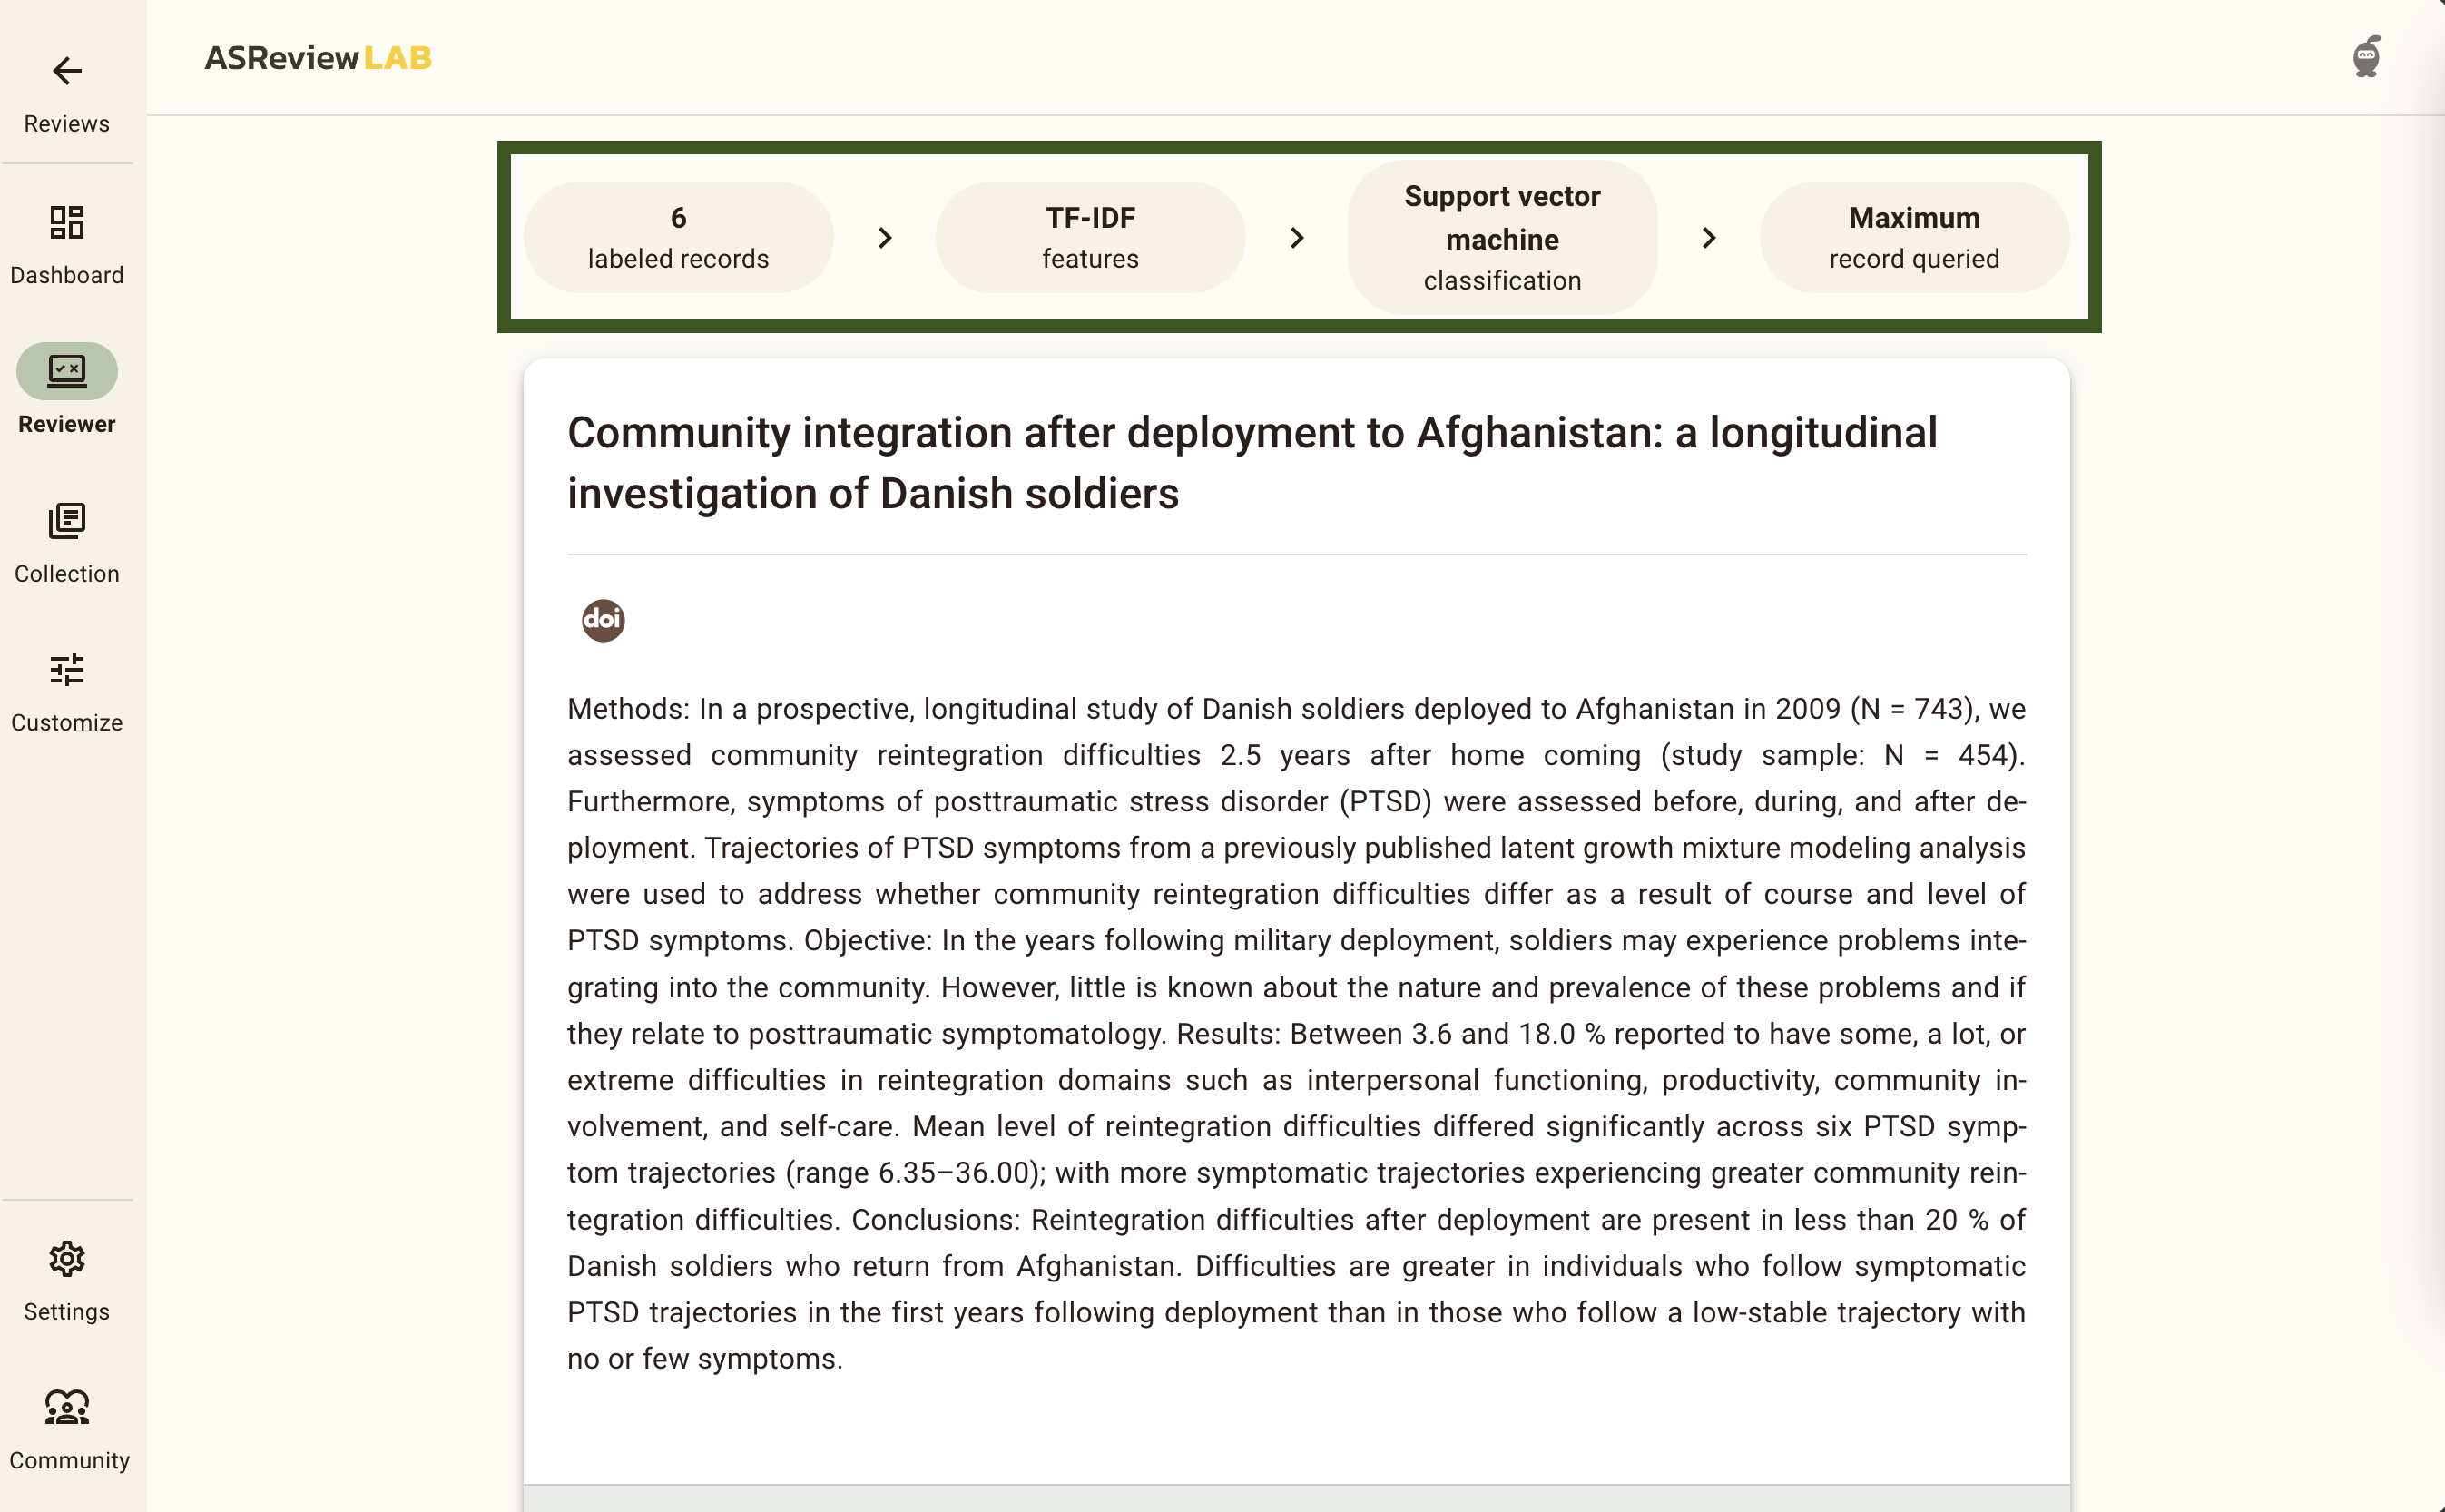
After your first Irrelevant decision, ELAS will have enough information to start training a model (at least 1 relevant and 1 irrelevant label). This is happening all whilst you are reading the next record. After a second labelling decision, either relevant or irrelevant, the banner at the top of the screening window will change from This record is presented in a random manner, to a summary of the ELAS model you are using, and on how many labelling decisions this record is based. If you want to learn more about these models, take a look at our documentation.
If you see nothing above a record, click on Settings in the menu on the left and switch on Show model information.
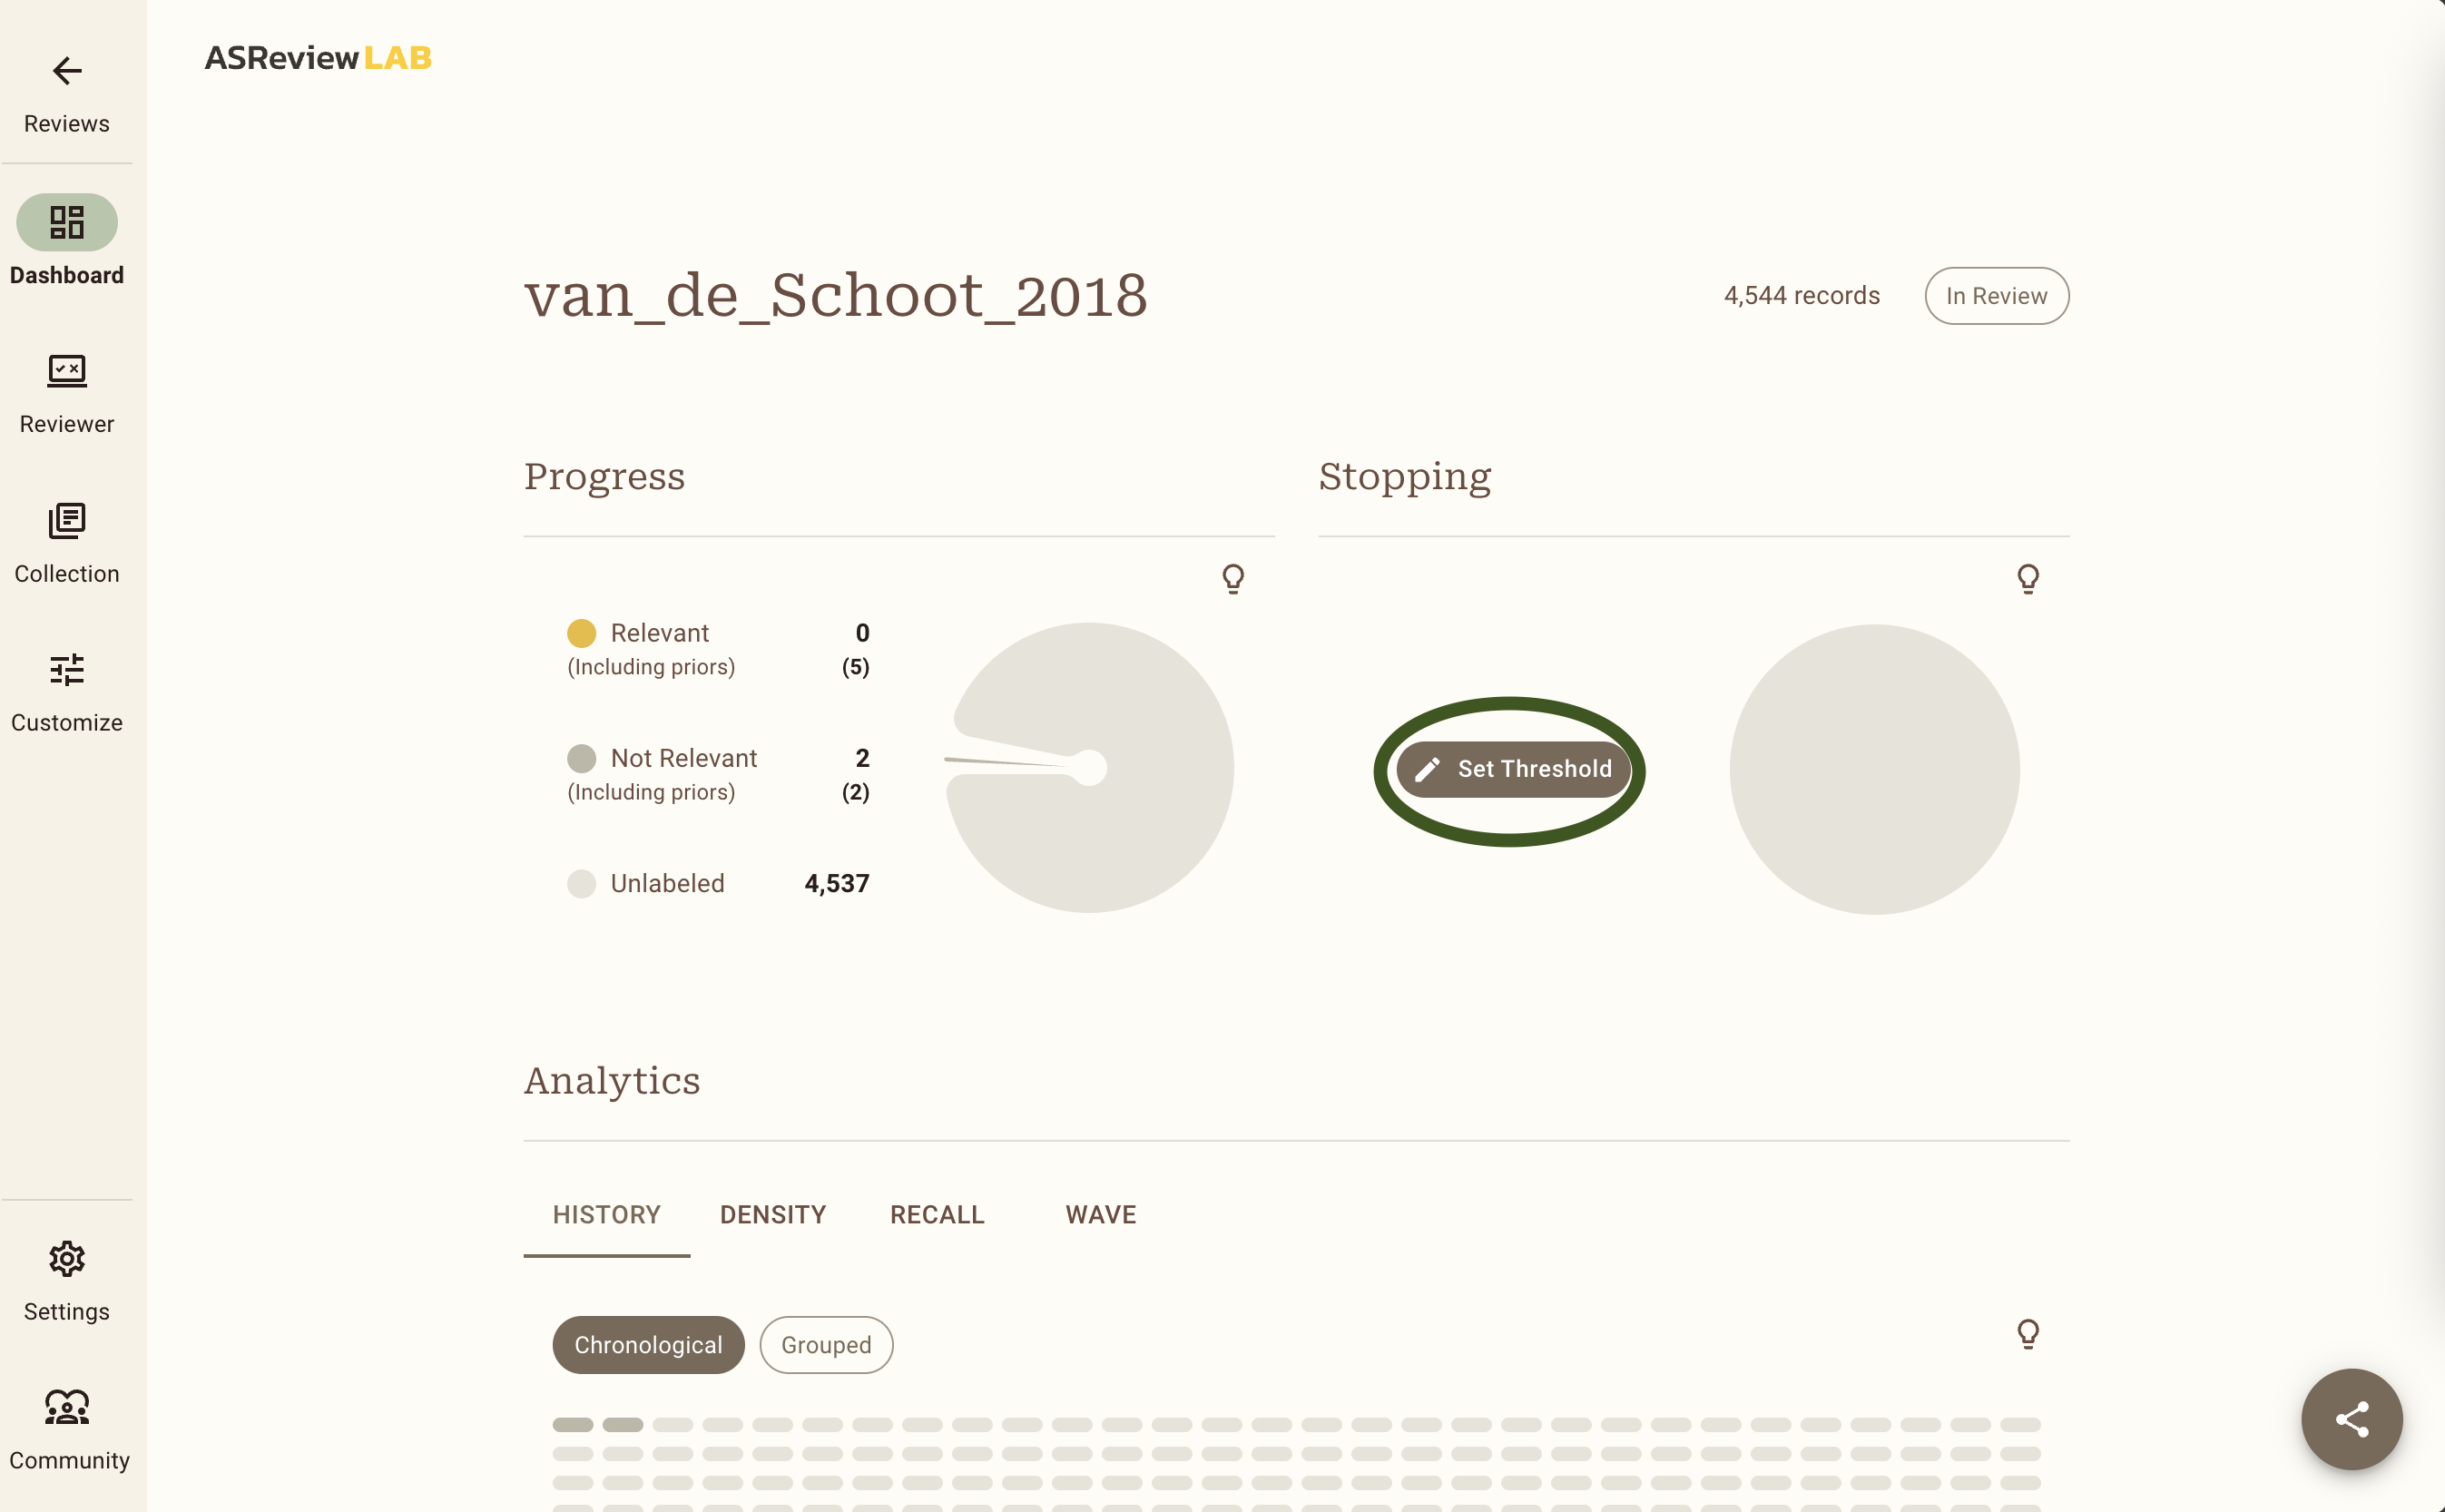
Now, all we need is a Stopping Rule to determine when you are confident that you have identified (almost) all relevant records in your dataset. Click on Dashboard in the menu on the left of the screen.
For this exercise, we will use 50 consecutive irrelevant records as the stopping rule. On the Dashboard page, click on Set Threshold and set a manual threshold of 50. Once you hit 50 irrelevant records in a row you will get a popup, but you can also check up on your progress on the Dashboard page. To continue screening, go back to the Reviewer screen by clicking on the Reviewer button in the menu on the left.
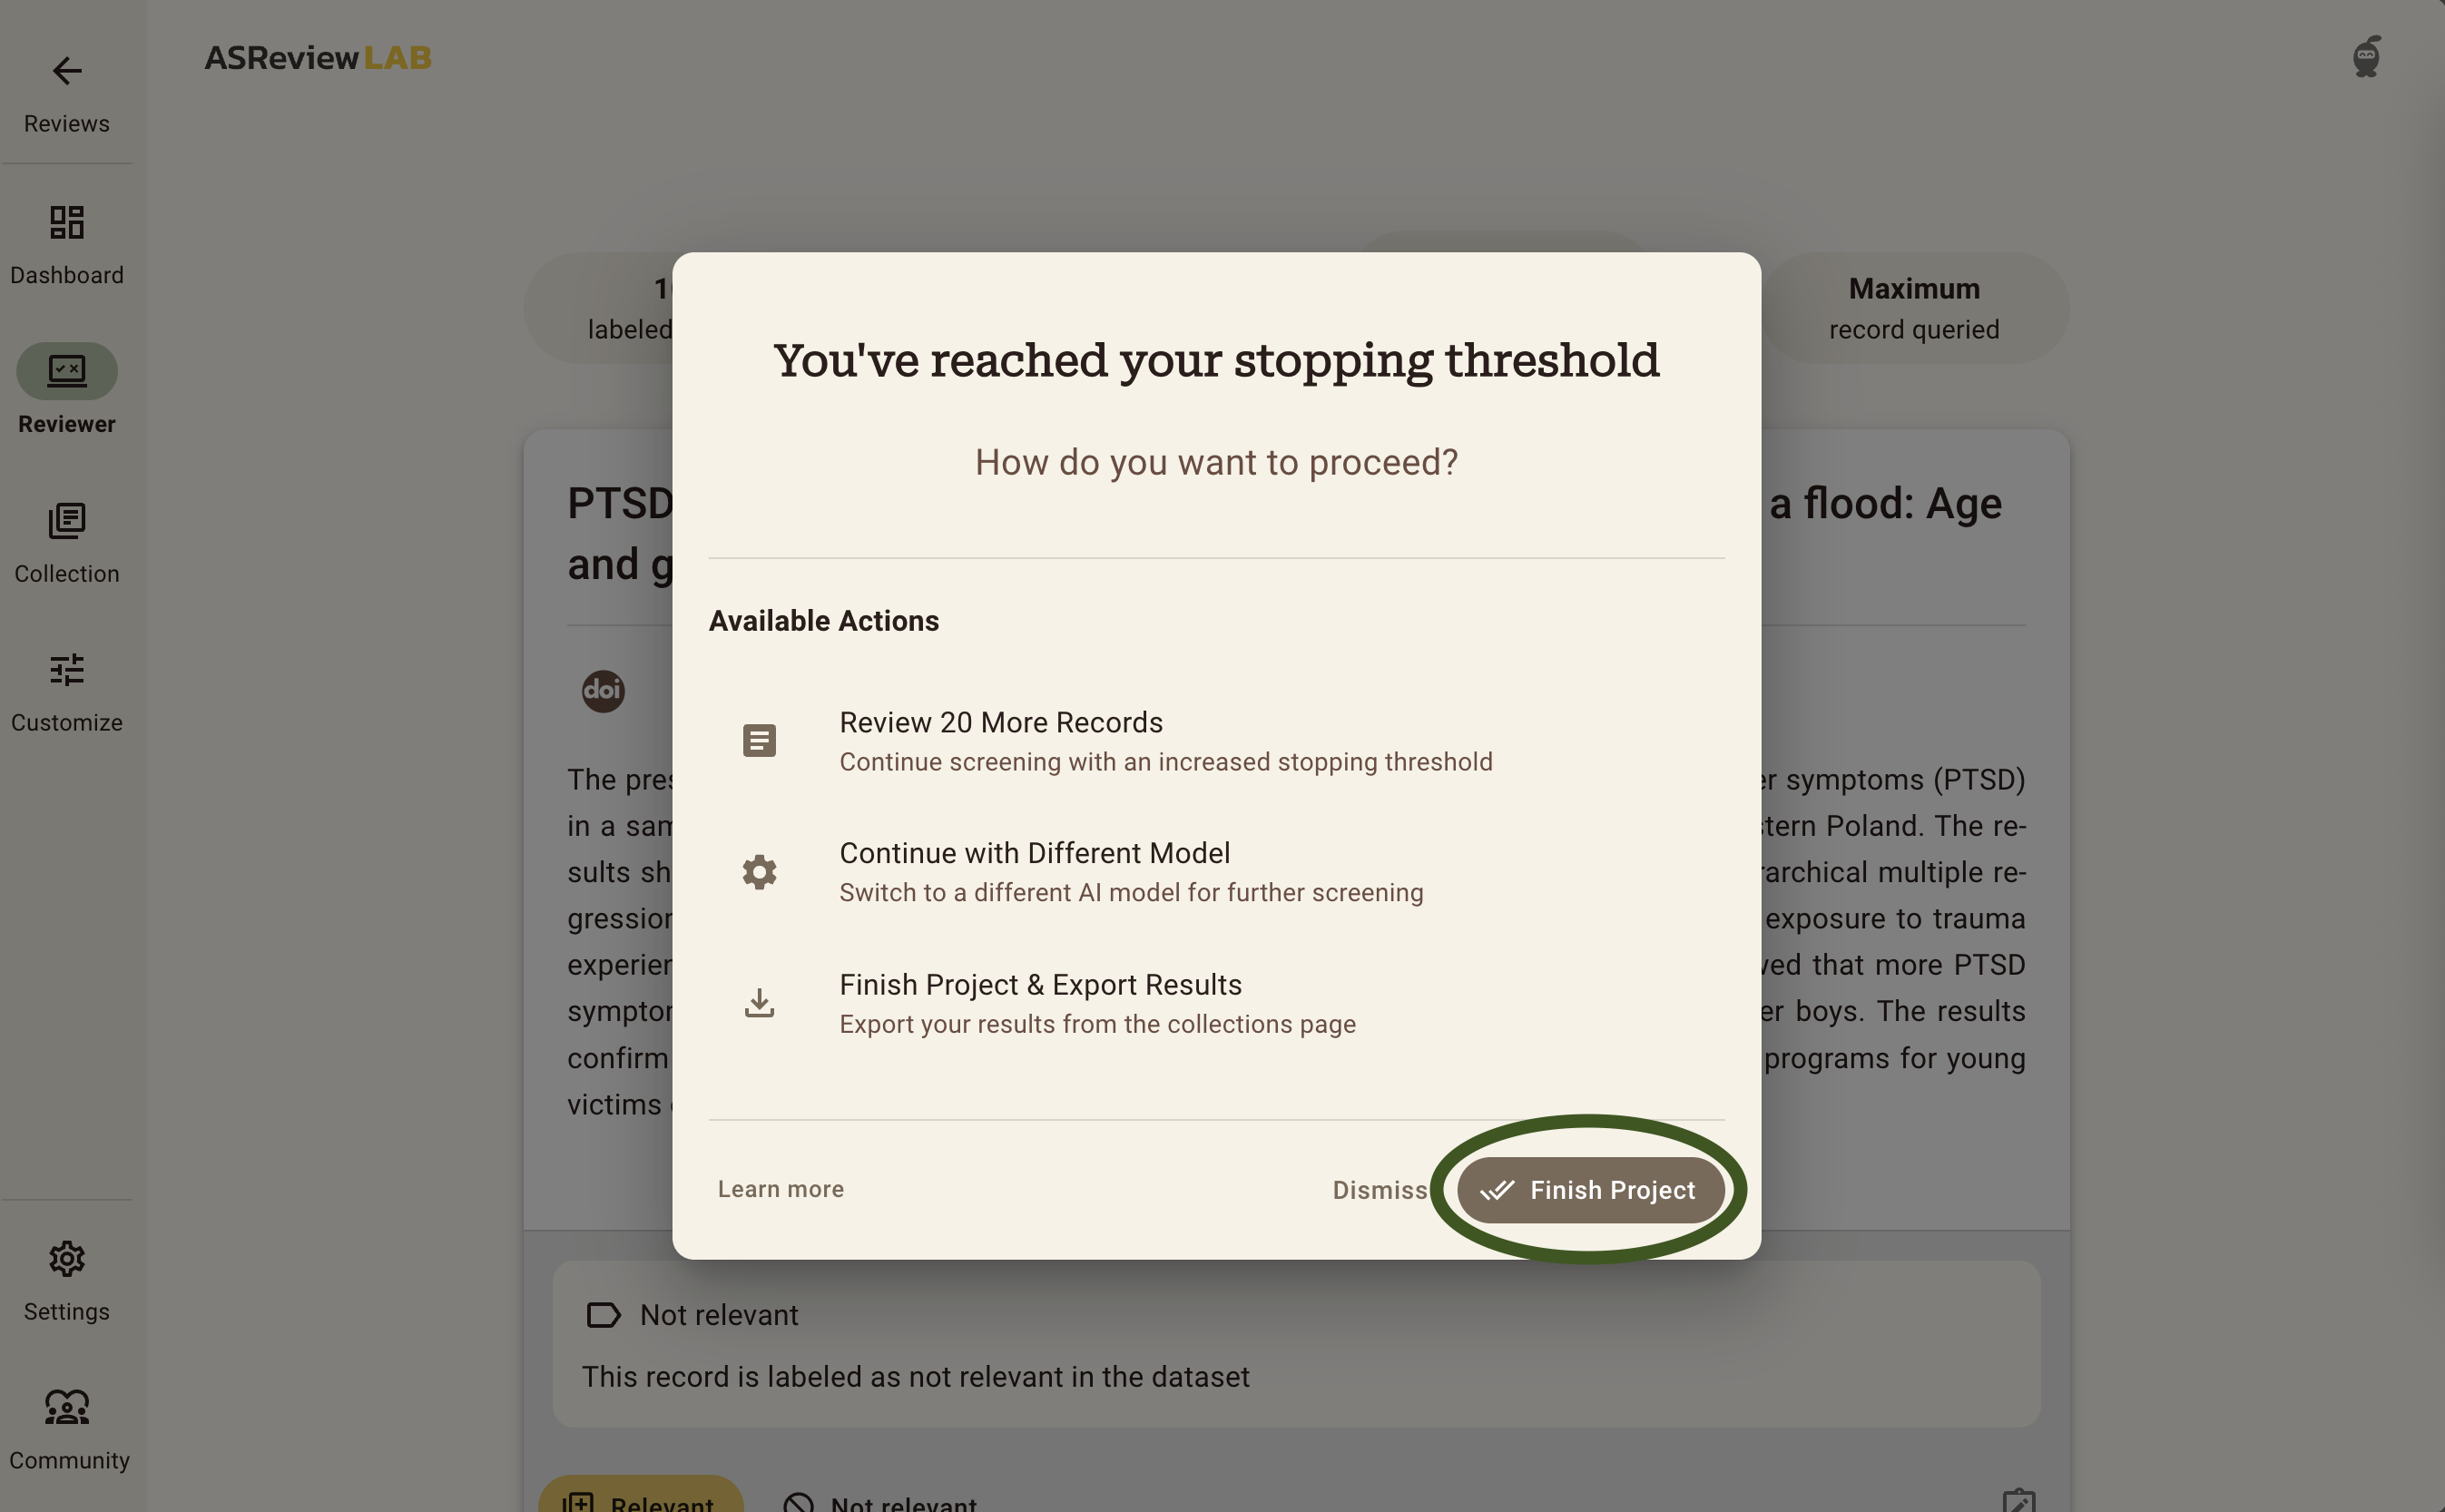
When you have reached your Stopping Rule, you will be presented with a popup asking you whether you want to screen additional records, continue with a different model, or to finish the project and export your data. For this exercise, we will simply click on Finish Project in the bottom right, which will finish your project, and take you to the Dashboard.
Here you can see the summary statistics of your project such as the number of records you have labeled relevant or irrelevant. It also shows how many records are in your dataset and how many records you labeled irrelevant since you have screened the last relevant record. For more information about how to read these summary statistics and interpret the corresponding charts, check out the documentation.
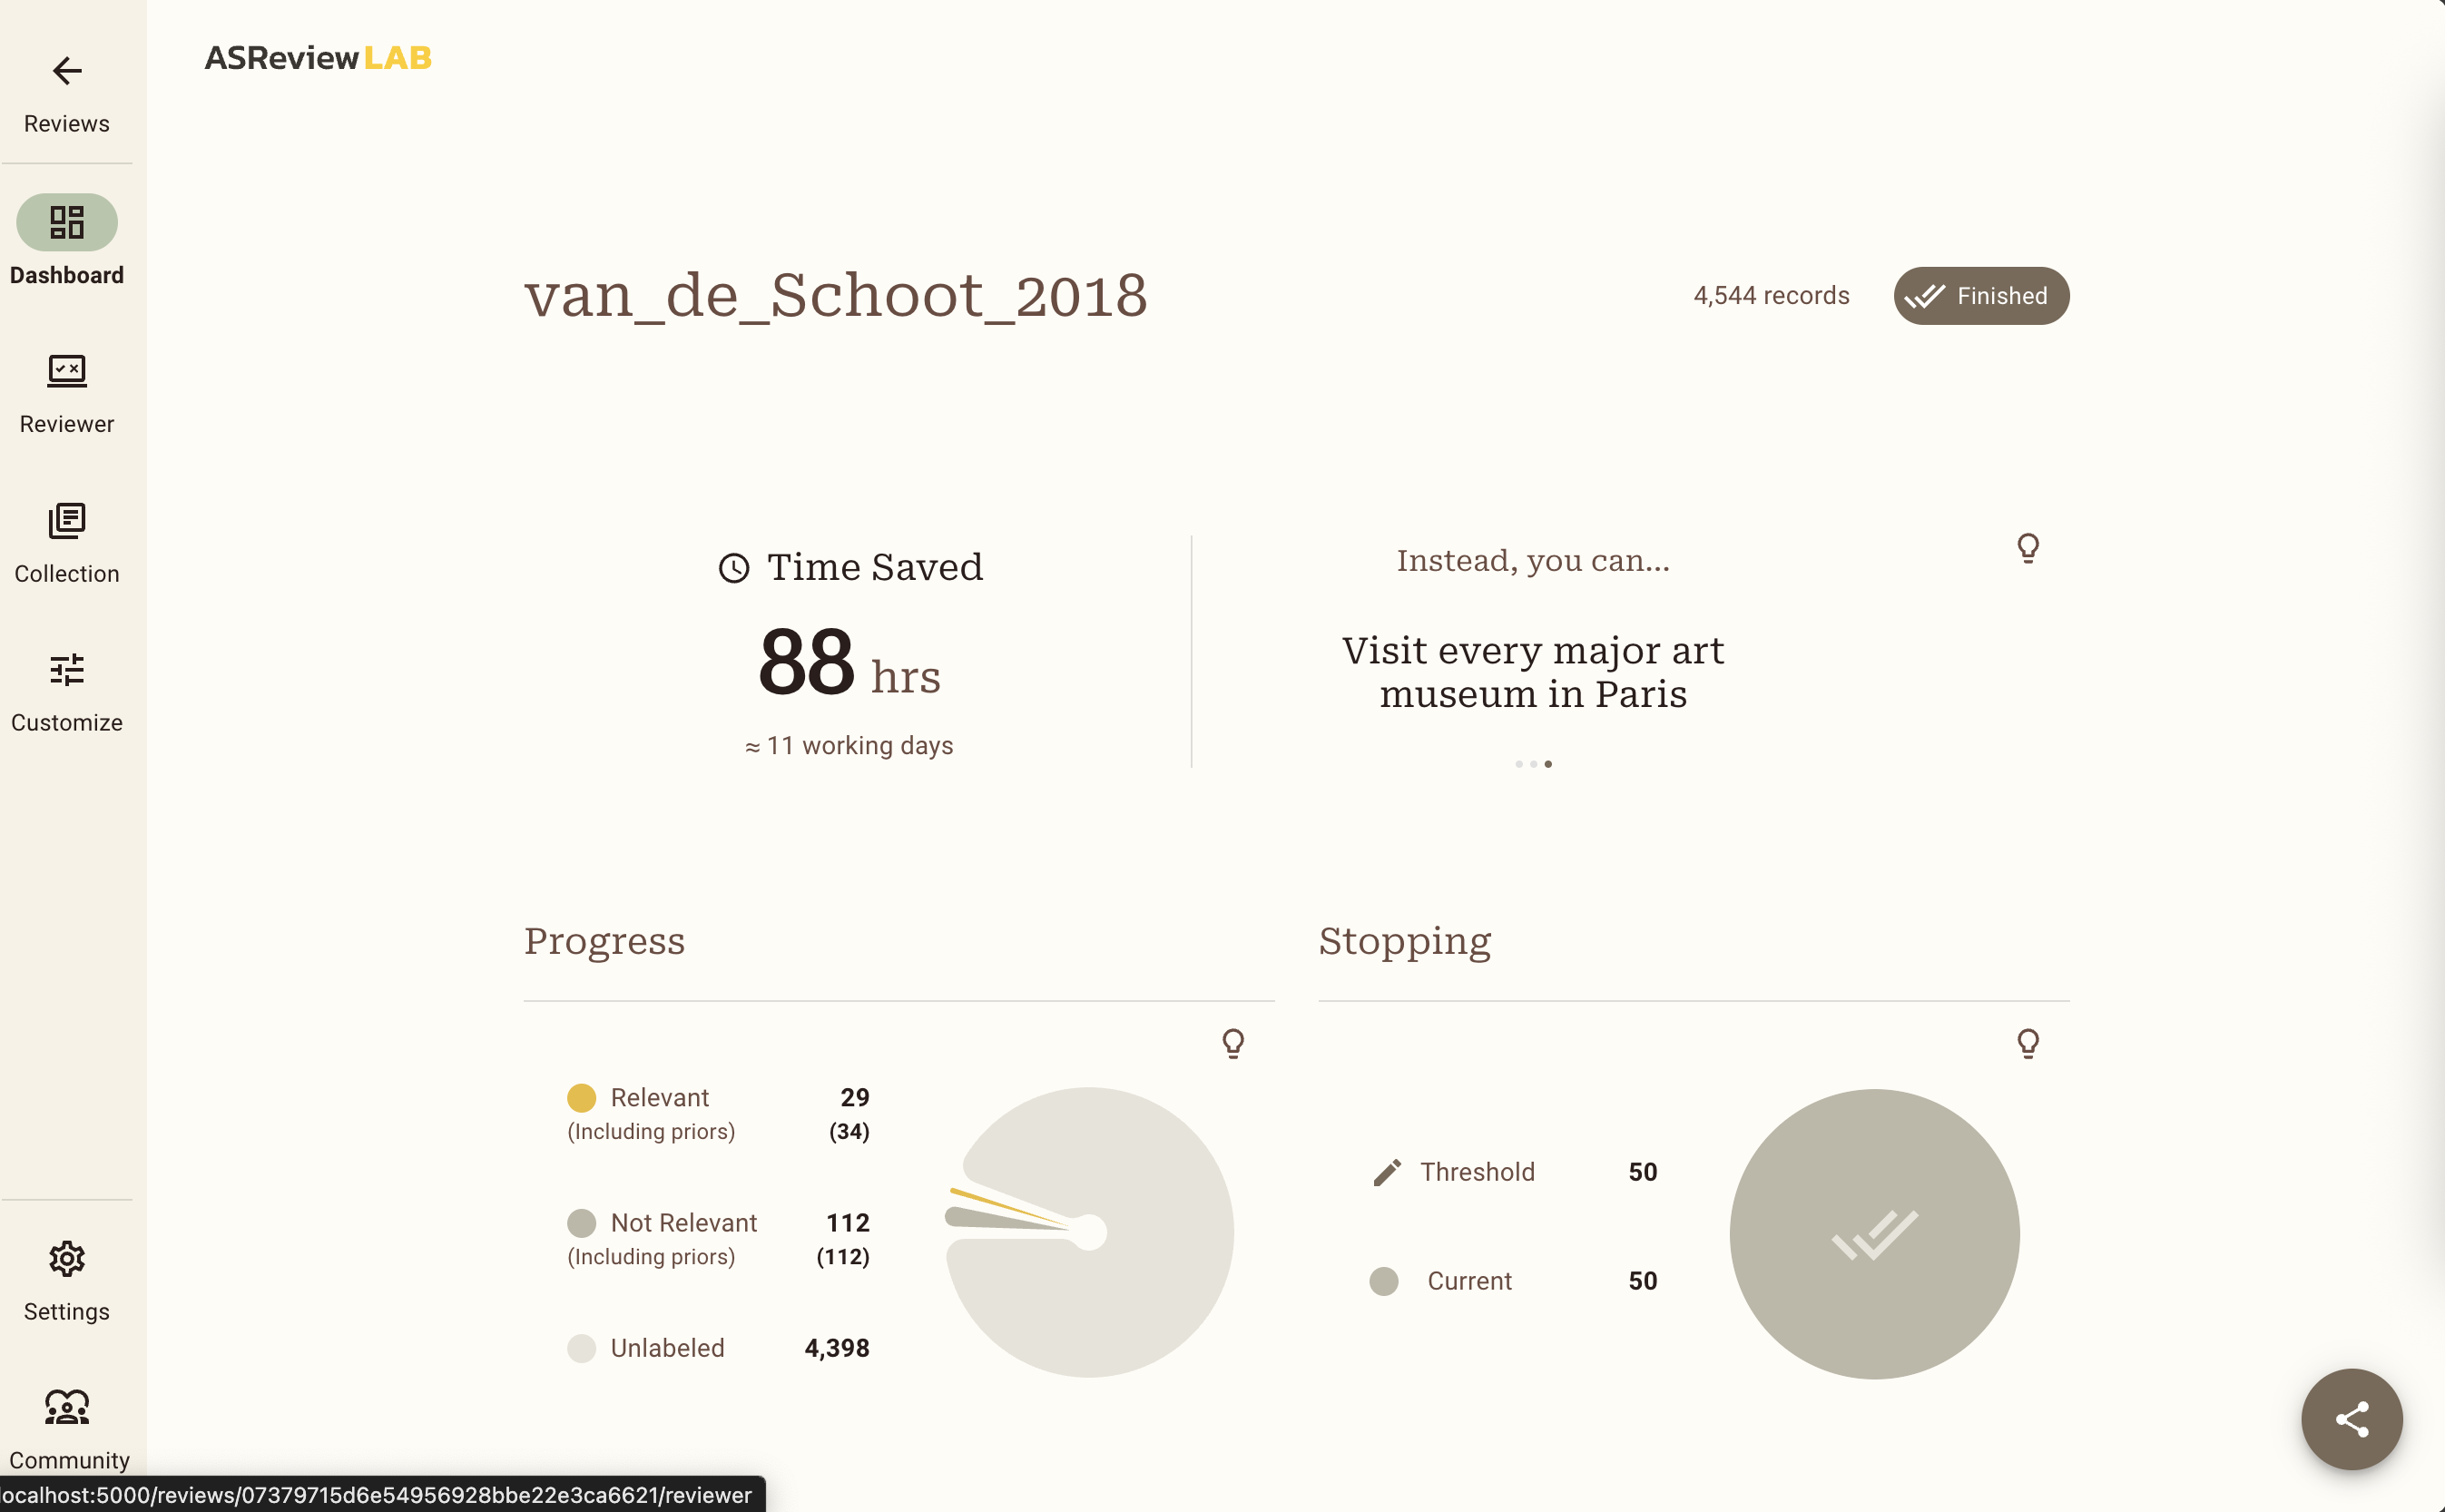
The Van de Schoot (2018) dataset contains 38 relevant records in this particular example. Did you get to label all of them as relevant before you reached your Stopping Rule? If you did, great!
What is the percentage of total papers you needed to screen to find the number of relevant records you have found? Is it <100%? Then, you were quicker compared to the original screeners of the dataset!
You probably had to screen about only 2-3% of the data. Amazing right?! Chances are though that you did not get to see all of the relevant records before you stopped screening. Do you think this is acceptable? There is a trade-off between the time spent screening and the error rate: the more records you screen, the lower the risk of missing a relevant record. However, screening all records in your dataset is still no guarantee for an error rate of zero, since even traditional screening by humans - which is the gold standard to which we compare AI-assisted screening - is not perfect 1.
Your willingness to accept the risk that you may exclude some relevant records is something to take into account when deciding on a Stopping Rule. Read more about Stopping Rules and how to decide on a good strategy for your data on the discussion platform.
Step 7: Extracting and inspecting the data
Now that you found all or most relevant records, you can export your data using these instructions. If you choose to inspect your data in Excel, download the data in Excel format. If you prefer to inspect your data in R or Python, download the CSV (UTF-8) format and open it in R or Python.
You can find all the data that was originally imported to ASReview in the exported data file, in a new order and with two new columns added at the end.
Using the information about the Read the Docs page can you reorder your data to appear in the order in which you loaded them into ASReview? And back to the order provided by ASReview?
Check if the number of records coded asreview_label = 1 corresponds to the number of relevant records on the Dashboard. This column indicates which records you labeled as relevant during the screening process. From which row number, based on the original ordering, do the included articles come from?
For the last exercise, it is important to change the order back to the order provided by ASReview. Lastly, check out the first few records with no number in the included column. Are those articles labeled as relevant in the original dataset? (Whether or not a record was pre-labeled as relevant is shown in the column label_included in the original dataset.)
Goal
In the beginning of the LAB the following goal was specified: “The goal of this LAB is to get familiar with AI-aided screening by making use of ASReview LAB.” Did you achieve this goal?
If so: congratulations! You now know all the steps to create and screen for a systematic review. ELAS wishes you a lot of fun screening with ASReview!
Do you like the software, leave a star on Github; this will help to increase the visibility of the open-source project.
What’s next?
Some suggestions:
Read a blog posts about:
Ready to start your own project? Upload your own data and start screening in the Oracle mode!
Interested in learning what other AI models ASReview offers? Read the documentation and try to switch models in the
Customizescreen!Try to find the hidden memory game in ASReview (some people found it by going through the source code on Github… +1 for open-science!)
Footnotes
Wang Z, Nayfeh T, Tetzlaff J, O’Blenis P, Murad MH (2020) Error rates of human reviewers during abstract screening in systematic reviews. PLOS ONE 15(1): e0227742. <https://doi.org/10.1371/journal.pone.0227742>↩︎